Hi:Re User Guide 🤝
Table of Contents 📖
Introduction
Account Management
Essential Features
Basic Features
- Toggling the display
- Finding contacts by name
- Listing all matching information
- Adding a tag
- Deleting a tag
Advanaced Features
Additional information
- Built-In Features
- Design Philosophy
- FAQ
- Known Issues
- Command Summary
- Future Integrations
- Support and Feedback
Welcome Note
Greetings HR executives, managers and employees!
- Tired from scrolling through endless rows in spreadsheet applications?
- Worried about data leak issues caused by the lack in security of such applications?
- Frustrated by the slow, manual input of cell by cell in such applications?
- Need an economically viable HR application?
Hi:Re, our one-stop employee profiling application is for you!
User Guide Purpose:
This user guide serves to provide potential users like you with the information of Hi:Re, and to help new users onboard quickly and easily with Hi:Re.
We recommend reading our product information section first to understand what Hi:Re can do for you and if it suits your companies' needs! After that, dive into the quick start section, and we hope you enjoy using Hi:Re as your company's HR employee profiling solution!
- Encounter any problems with commands? Our Command section provides step-by-step usage with examples, as well as error troubleshooting!
- Have any burning questions? Our FAQ and Known Issues sections outlines the most common scenarios faced by users like you!
- Curious about our future plans? Our Future Integration section gives you a glimpse as to what is to come!
Product Information
Hi:Re is a desktop app for managing your employee details, optimized for use via a Command Line Interface (CLI) while still having the benefits of a Graphical User Interface (GUI).
Meaning: Most work is done via typing ✅ commands on a command line instead of clicking ❌ with your mouse 🖱!
Fast-typers, Hi:Re will be your best assistant to get your contact management tasks done faster than traditional GUI apps.
Regardless of your technical skill level, our User Guide will bring you up to speed and quickly master Hi:Re, that is already streamlined for HR purposes!
NOTE❗️ In Hi:Re, we adopt a system where contacts are identified by their email identity (ID for short) without the company email domain.
The ID is case-insensitive and accepts special characters, but NOT whitespaces.
Example: John is identified by his ID, john123 without the domain, @123company.com
Hence, we allow duplicate names and handphone numbers. Contacts are also required to be labelled with minimally one mandatory tag.
Breakdown of commands:
- Account Management: Register, Login and Logout
- Data Manipulation: Adding, Deleting, Editing a Contact and Clearing all Contacts
- Data Observation: Toggling the Display, Finding Contacts by name, Listing all matching information
- Command Management: Undoing and Redoing a Command
- Data Portability: Exporting to .csv file
- Link to our User Guide, Exit Hi:Re
Quick Start
Ensure you have
Java 11or above installed in your Computer.Download the latest
HiRe.jarfrom here.Copy the file to the folder you want to use as the home folder.
Open a command terminal, change your directory,
cd, to the folder you've placed theHiRe.jarfile inRun this command,
java -jar HiRe.jar, to start the application.
A graphical user interface (GUI) similar to the below should appear in a few seconds.Do note that the app contains sample data / contacts.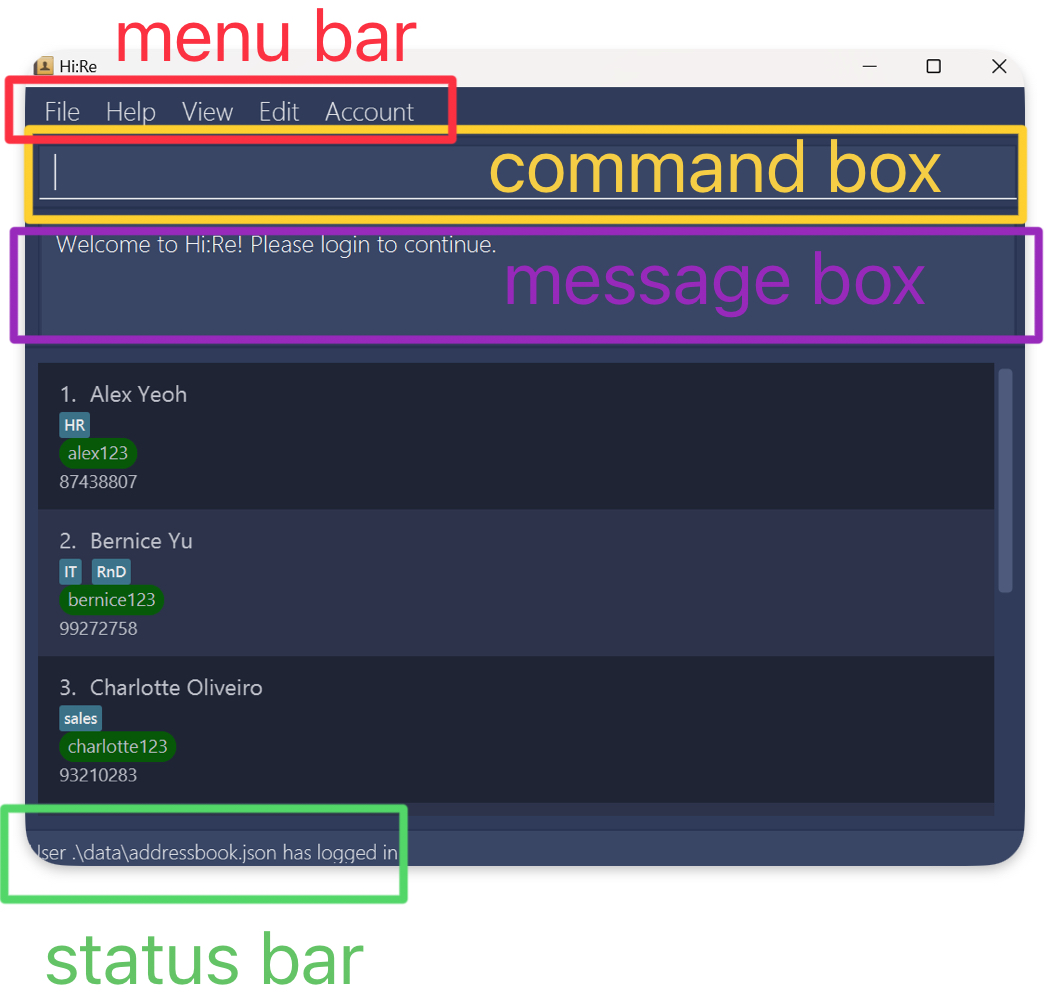
Type commands in the
command boxand press the[Enter](Windows & Linux) /[return](macOS) key to execute it, but first...Register an account before you are ready to use Hi:Re!
Log-in to your newly registered account with the correct username and password!
Refer to the Commands below for the specific details of each command.
Refer to the Built-In Features below for the details of each built-in feature.
Commands
Notes about the command format:
Words in
()are the parameters to be supplied by you, the user.
e.g. for- /id (id),(id)is the parameter to be supplied by you. Input a similar command as follows into the command box:- /id johndoe69.Words in
{...}are optional and may be repeated. e.g. in> /id (id) /tag (tag) {/tag (more tags)..}, the second/tagparameter may be excluded, or repeated as many times as you want.When using a PDF version of this document, be careful when copying and pasting commands that span multiple lines as space characters surrounding line-breaks may be omitted when copied over to Hi:Re.
Disclaimer for Account Management Features (Register, Login & Logout)
While our Account Management Features may imply that our product is a multi-user product, we would like to clarify and assure you that Hi:Re is a single user product.
Companies often form partnerships, collaborate and share resources.
Therefore, as an HR employee, you may be required to use multiple address books to effectively manage employees and partners from different companies.
To safeguard the information of each company, the use of multiple address books, locked behind different user accounts and passwords, is essential.
Registering an account: register
Register an account to kickstart your own Hi:Re journey! When handling employees from more than one company, additional account(s) can be created to segregate their contact information.
Format: register /u (username) /p (password)
Example: register /u johndoe /p 123456
- A valid
passwordshould be between 6 - 20 characters long and does not contain spaces. - A valid
usernameshould be alphanumeric and between 4 - 10 characters long. - Usernames are unique and cannot be duplicated.
- Confirmation of successful registration
Upon successful registration, you will see a similar GUI as illustrated below.

How to handle error during registration?
Duplicate username eror: If you enter a non-unique username, the error will be triggered.
Duplicate username error

Incomplete field error: You are required to fill in all fields. Failure to complete all required fields will trigger the error.
Incomplete fields error

Invalid field error: Any input field violating the requirements will trigger the error. You can follow the username and password requirements above.
Invalid fields error
- Invalid username

- Invalid password

Log in to account: login
Log in to Hi:Re after creating your addressbook account.
Format: login /u (username) /p (password)
Example: login /u johndoe /p 123456
- A valid
passwordshould be between 6 - 20 characters long and does not contain spaces. - A valid
usernameshould be alphanumeric and between 4 - 10 characters long.
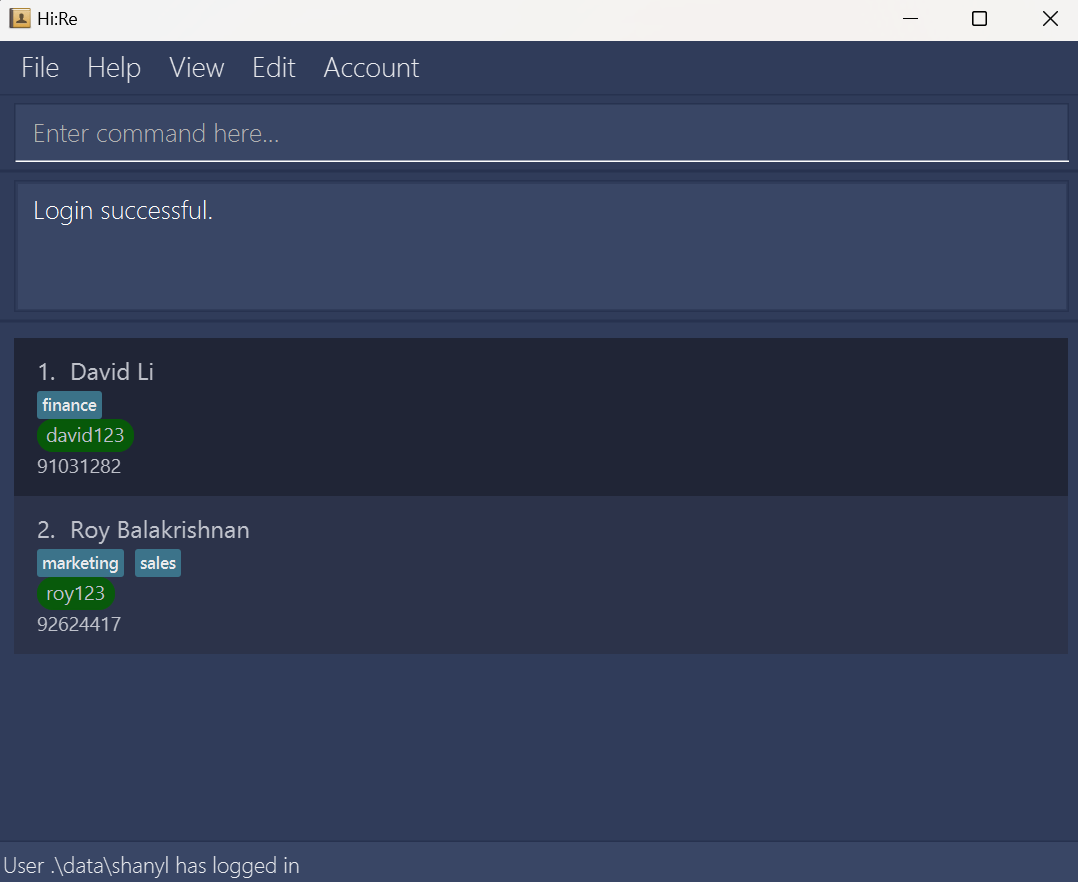
- Confirmation of successful login
Upon successfully login, you will see a similar GUI as illustrated below.
You are also able to see the current addressbook file you are accessing in the status bar at the bottom of the application.
Depending on your system, the file path may be different.
Nonetheless, you should be able to see the correct username in the status.
Before you log in, the status bar should display "No user currently logged in" or "User .\data\addressbook.json has logged in", depending on your system.
How to handle error during login?
Incomplete field error: You are required to fill in all fields. Failure to complete all required fields will trigger the error.
Incomplete fields error

Invalid field error: Any input field violating the requirements will trigger the error. You can follow the username and password requirements above.
Invalid fields error
- Invalid username

- Invalid password

Incorrect username / password error: If you have entered the username or password incorrectly, the error will be triggered.
Incorrect username or password error

Already logged-in error: If you are already logged in, you cannot log in again. If you are switching to another account, do logout first, before you log in to another account that you have registered.
Already logged-in error:

Logout from Account: logout
After you have finished using Hi:Re, log out to protect your data.
Format: logout
💡 Tip
You can also log out by clicking in the Account section of the menu bar.
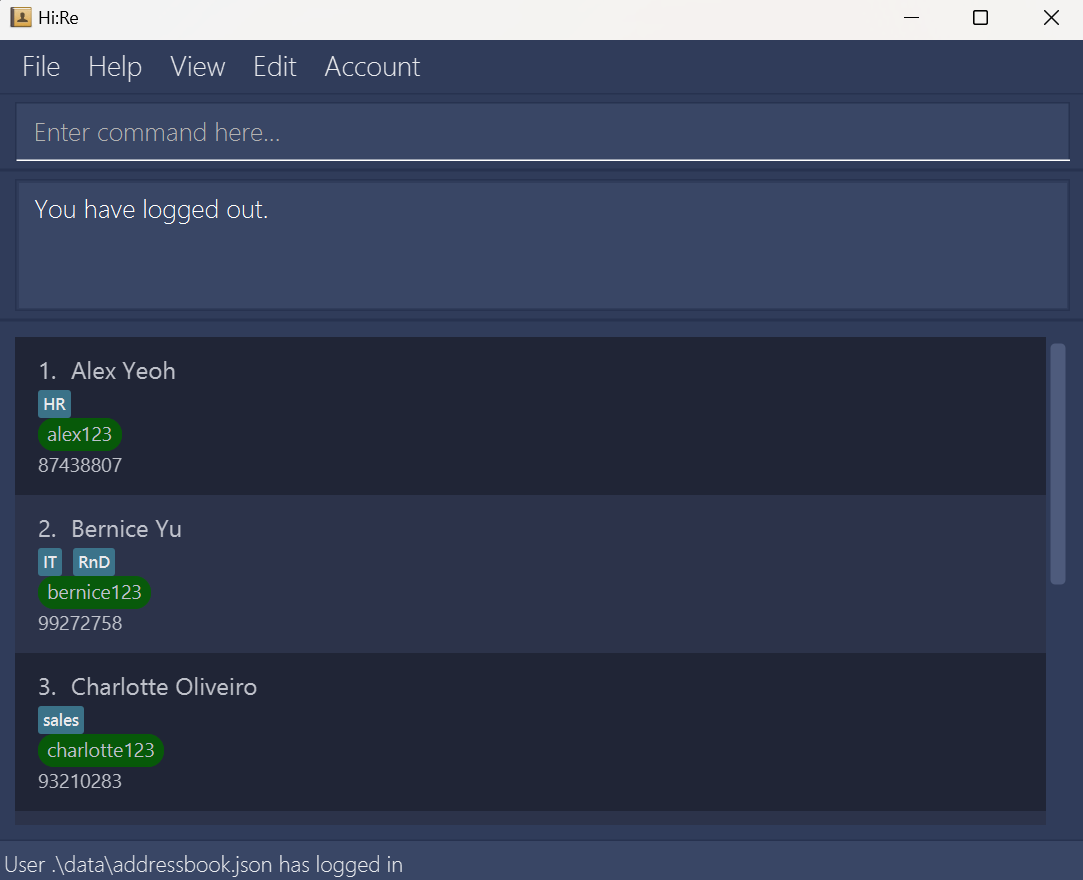
- Confirmation of successful logout
Upon successful log out, you will see a similar GUI as illustrated below.
How to handle errors during logout
- Not logged-in error: If you haven't logged in, you cannot log out. Attempting to do so will trigger the error.Not logged-in error:

- Not logged-in error: If you haven't logged in, you cannot log out. Attempting to do so will trigger the error.
Adding a contact: +
You can add a contact to the addressbook to save his / her contact details and information.
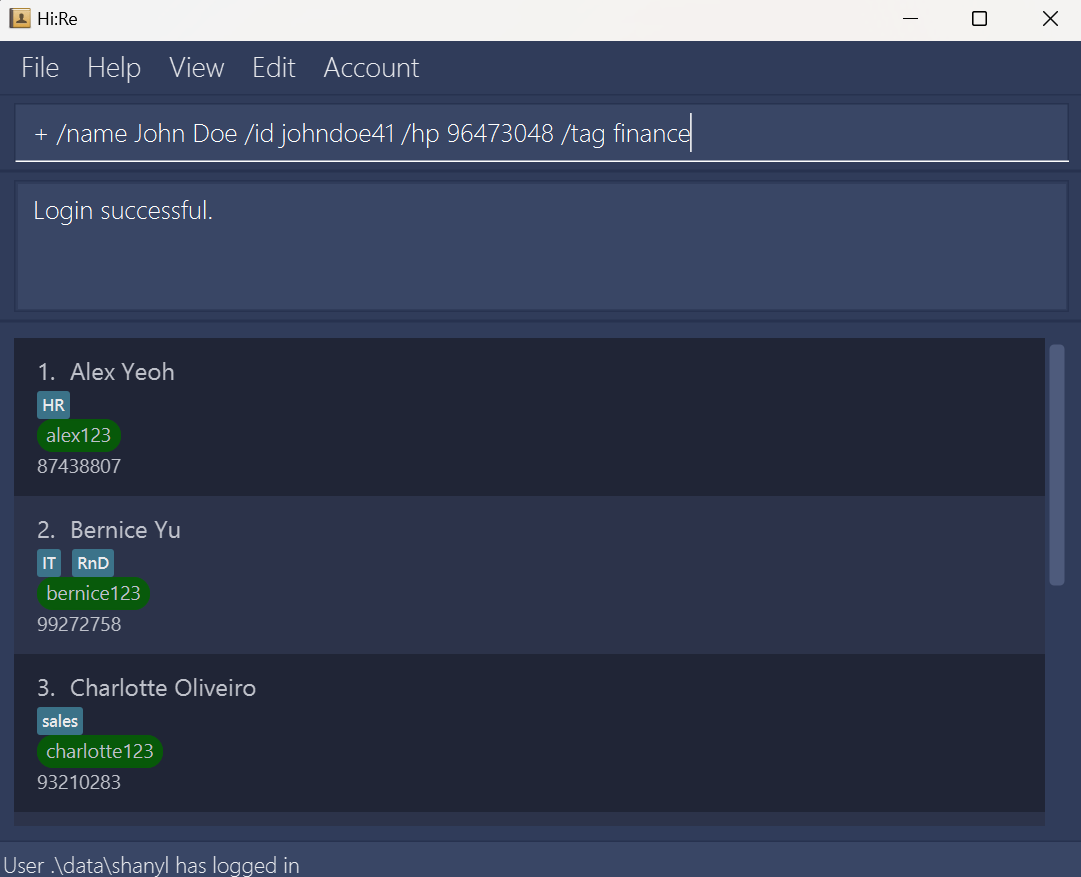
Format: + /name (name) /id (id) /hp (handphone) /tag (tag) {/tag (more tags)...}
Example:
- With one tag:
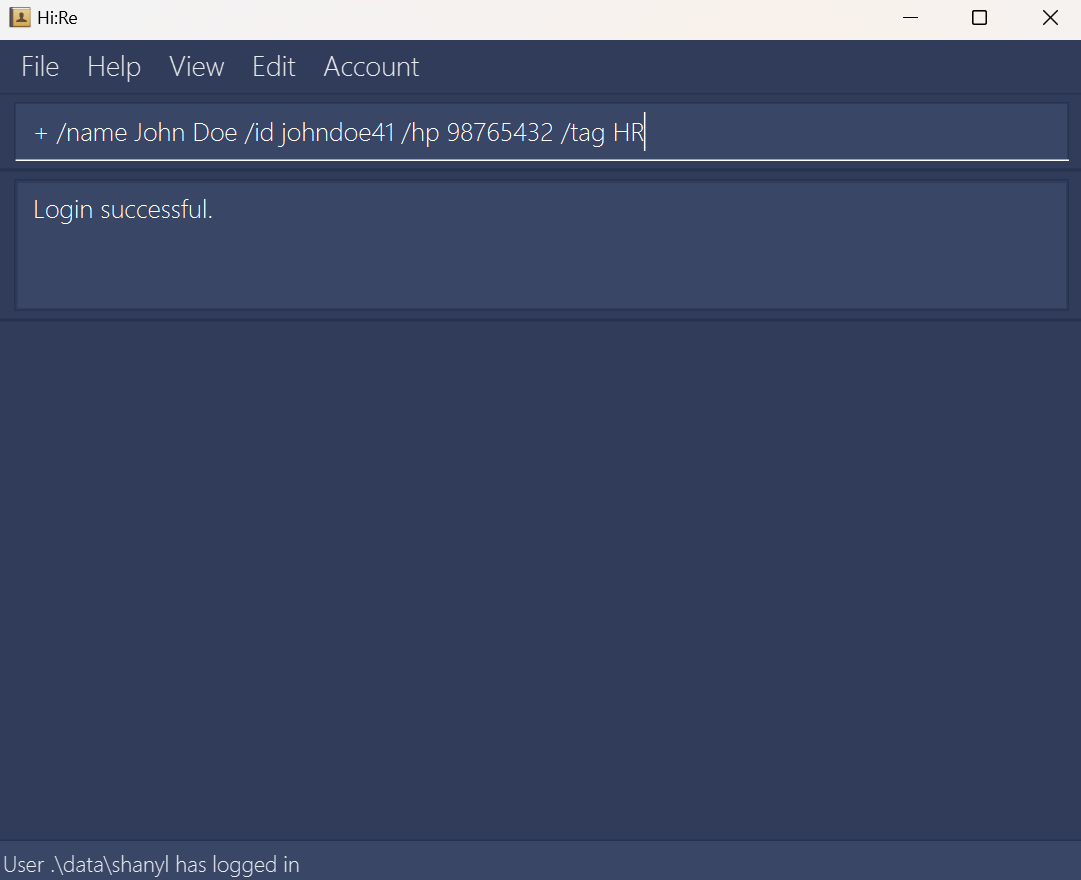
+ /name John Doe /id johndoe41 /hp 98765432 /tag finance - With more than one tags:
+ /name John Doe /id johndoe41 /hp 98765432 /tag finance /tag sales
The order of each prefix and field set is interchangeable. You are abl to input each set of details in any sequence as long as all required information is provided.
The
nameshould only contain alphanumeric characters and spaces, and should not be blank.
i.e. Names containing non-alphanumeric characters such as Rui-En or Ravi S/O Balakrishnan are not supported for the current version.The
IDmust be unique for each contact. Attempting to use a duplicate ID will result in an error.The
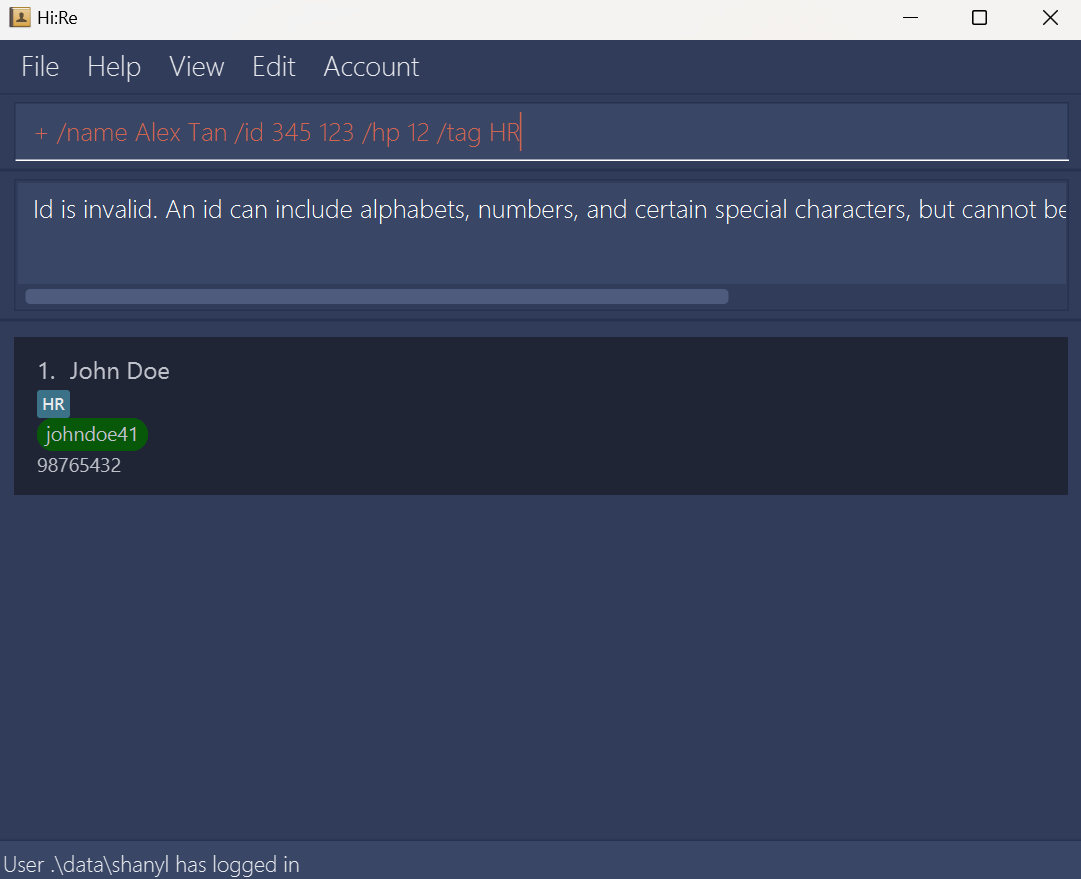
IDcan include alphabets, numbers, and special characters, but cannot be blank and should not contain whitespaces.The
phone numbershould only contain numbers, and it should be at least 3 digits long.Only one
phone numberis allowed for the current version.Excessively long fields will be text-wrapped appropriately.
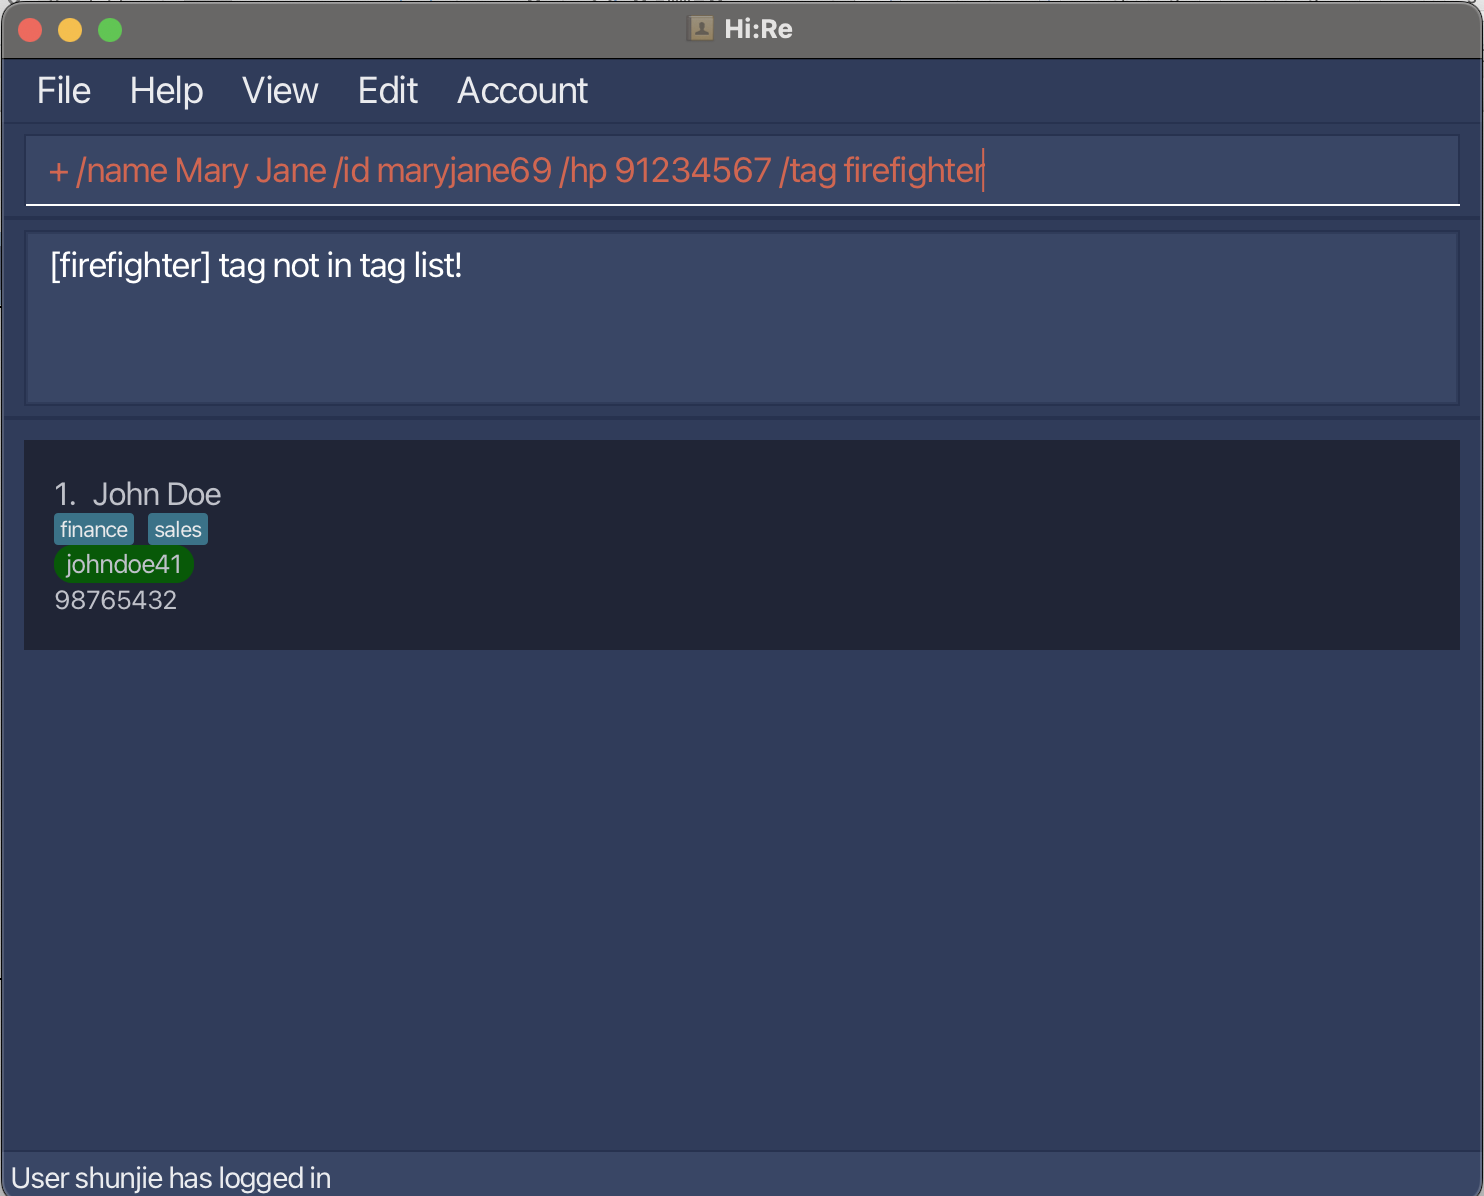
All tags for a contact MUST be in the tag list. You can add tags to the tag list with the add tag command.
A person MUST have at least one tag, and can have more than one tag (refer to example above)
(The Initial UI before addition)
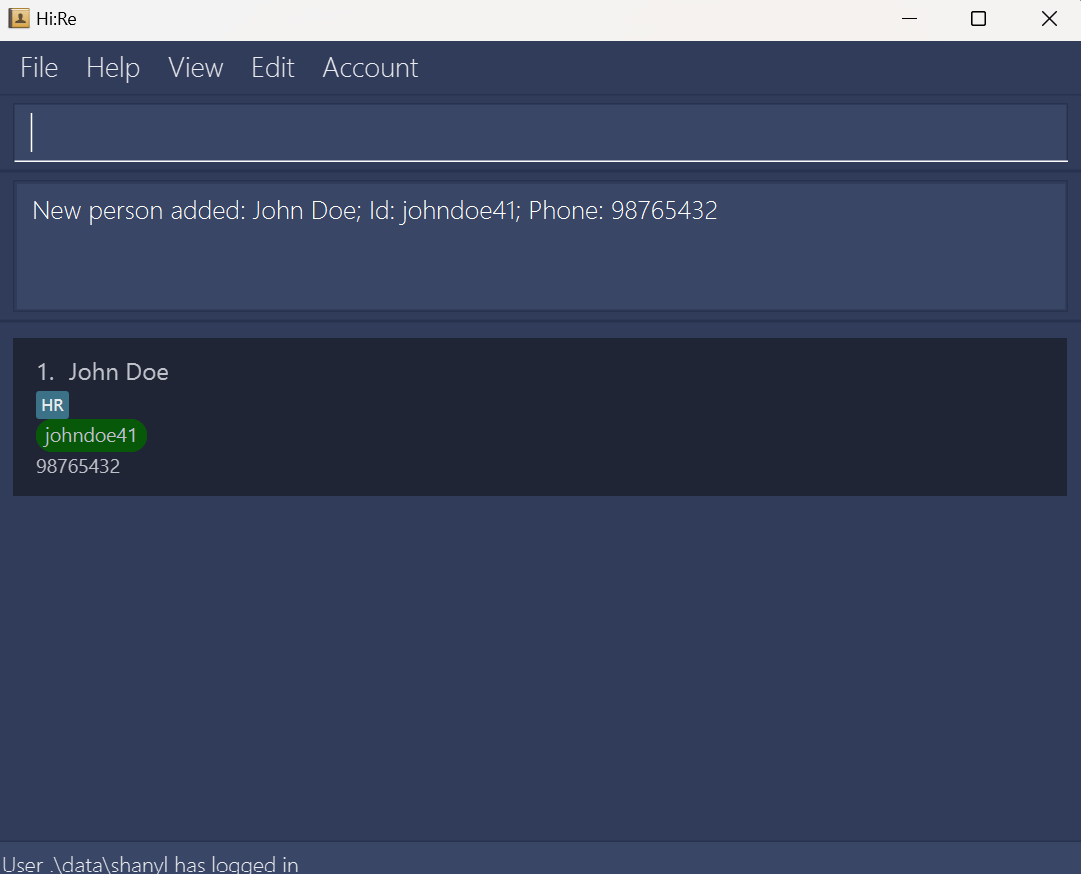
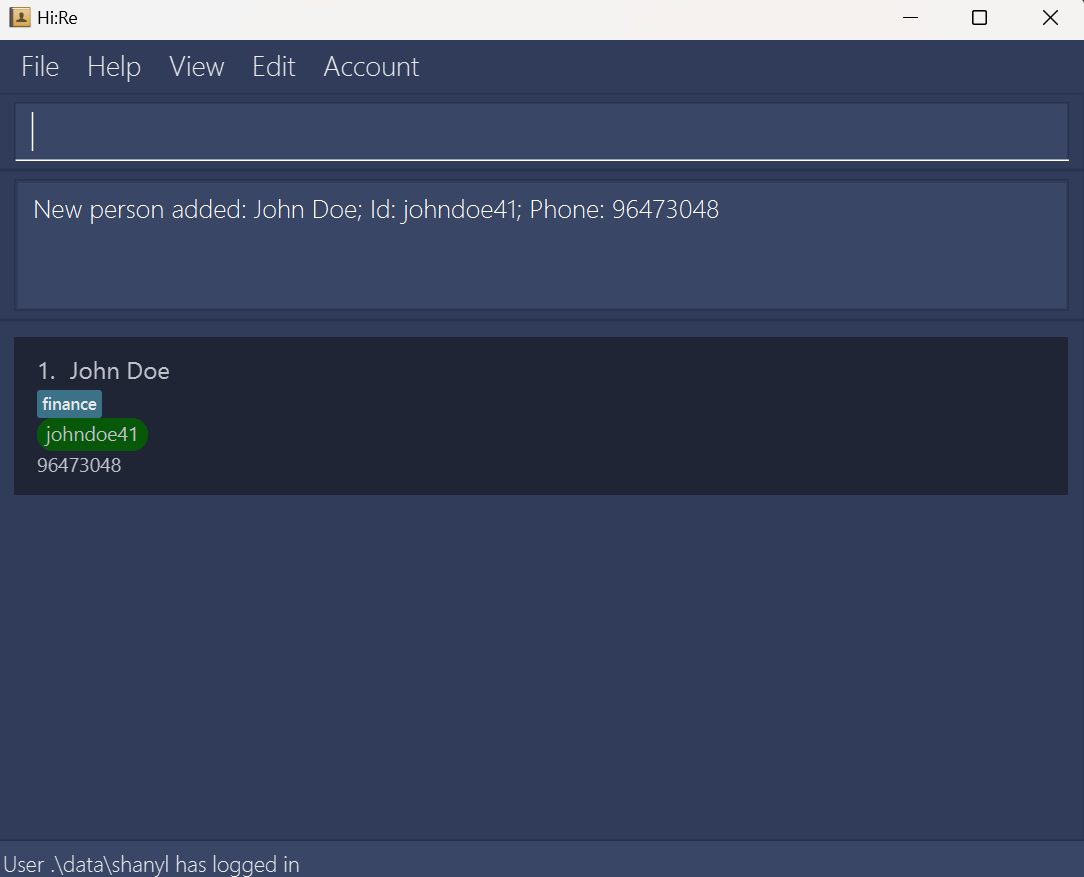
- Confirmation of successful contact addition
Upon entering a valid set of inputs for the + command, you will see a similar GUI indicative of successful contact addition, as illustrated below.
How to handle contact when adding contacts?
- Duplicate ID error: You will trigger the error uppn the entry of a non-unique ID.Duplicate ID error
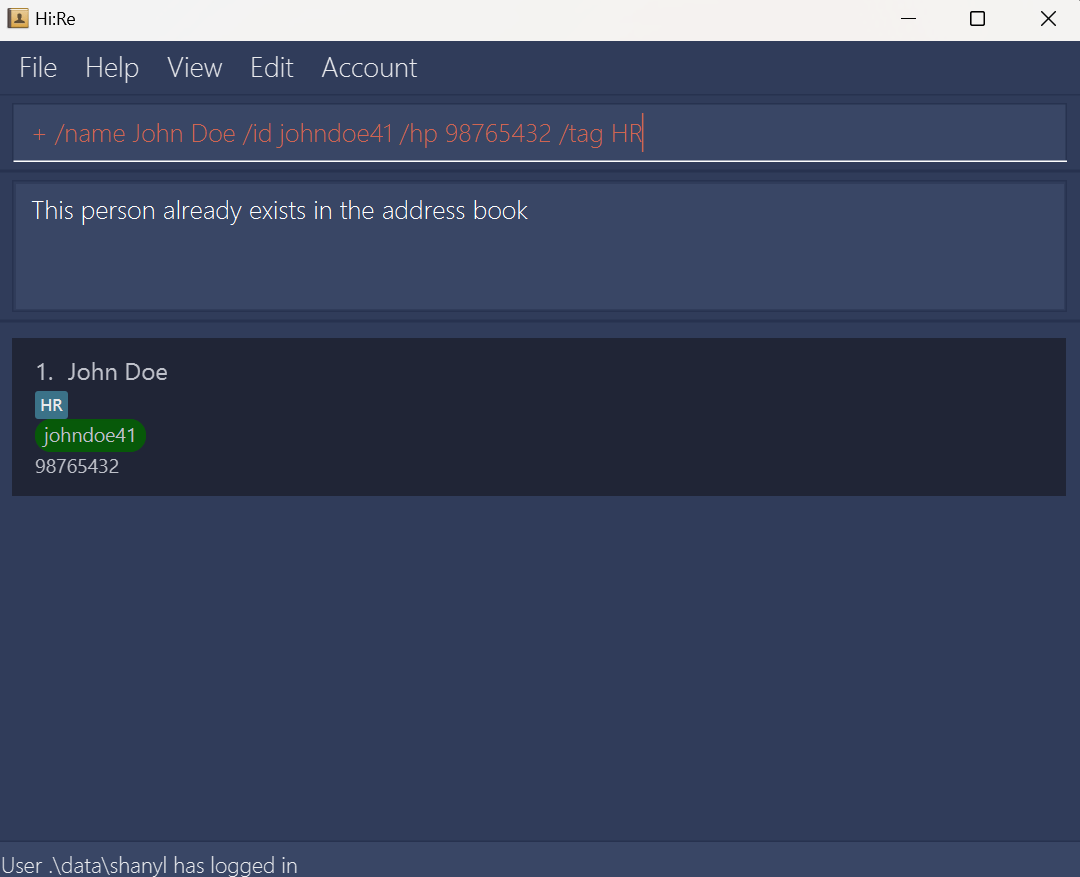
- Duplicate ID error: You will trigger the error uppn the entry of a non-unique ID.
Incomplete field error: You are required to fill in all fields. Failure to complete all required fields will trigger an error.
Incomplete field error
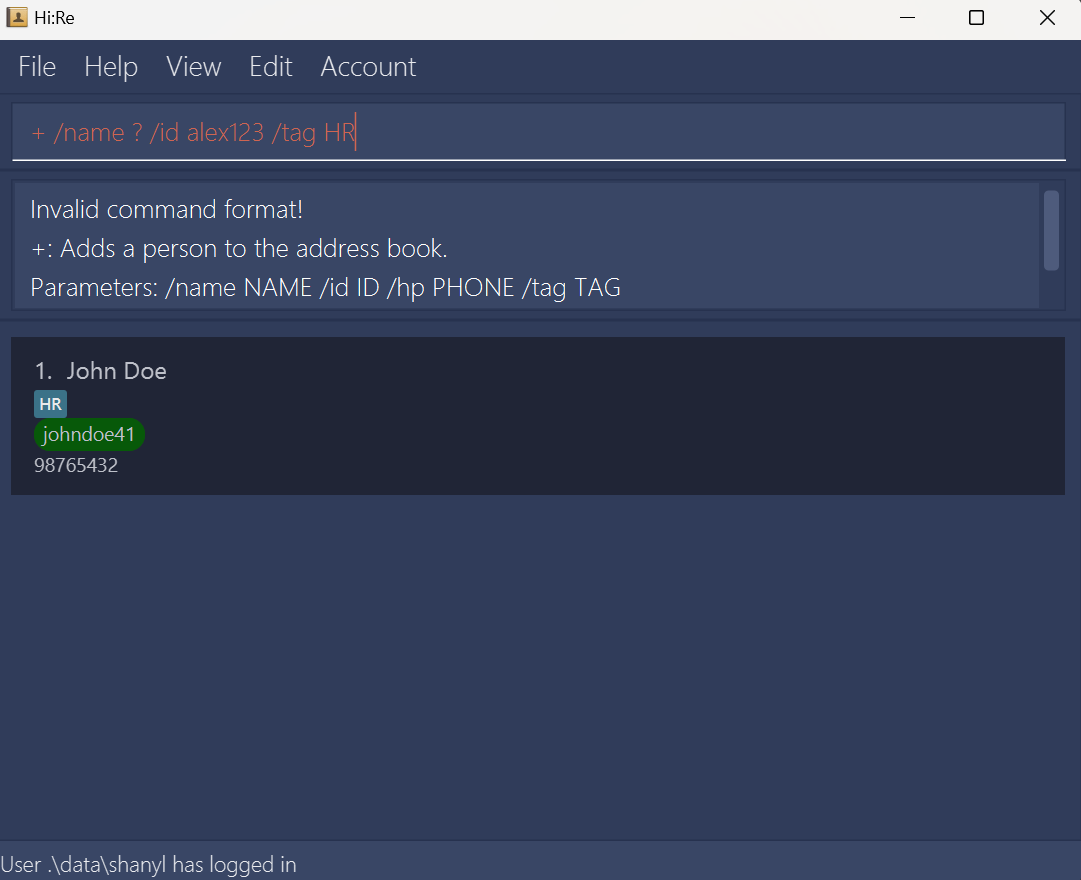
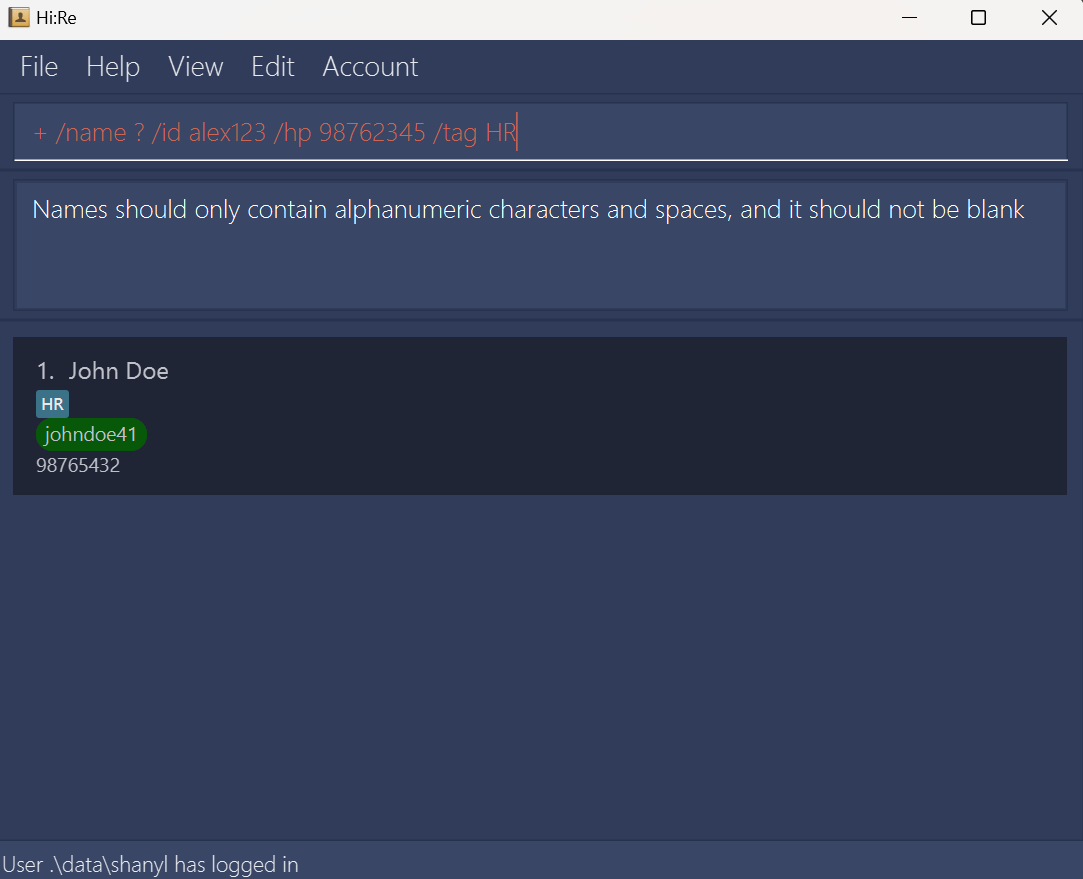
Invalid field error: Any input field violating the requirements will trigger the error. You can follow the requirements above.
Invalid field error
- Invalid name
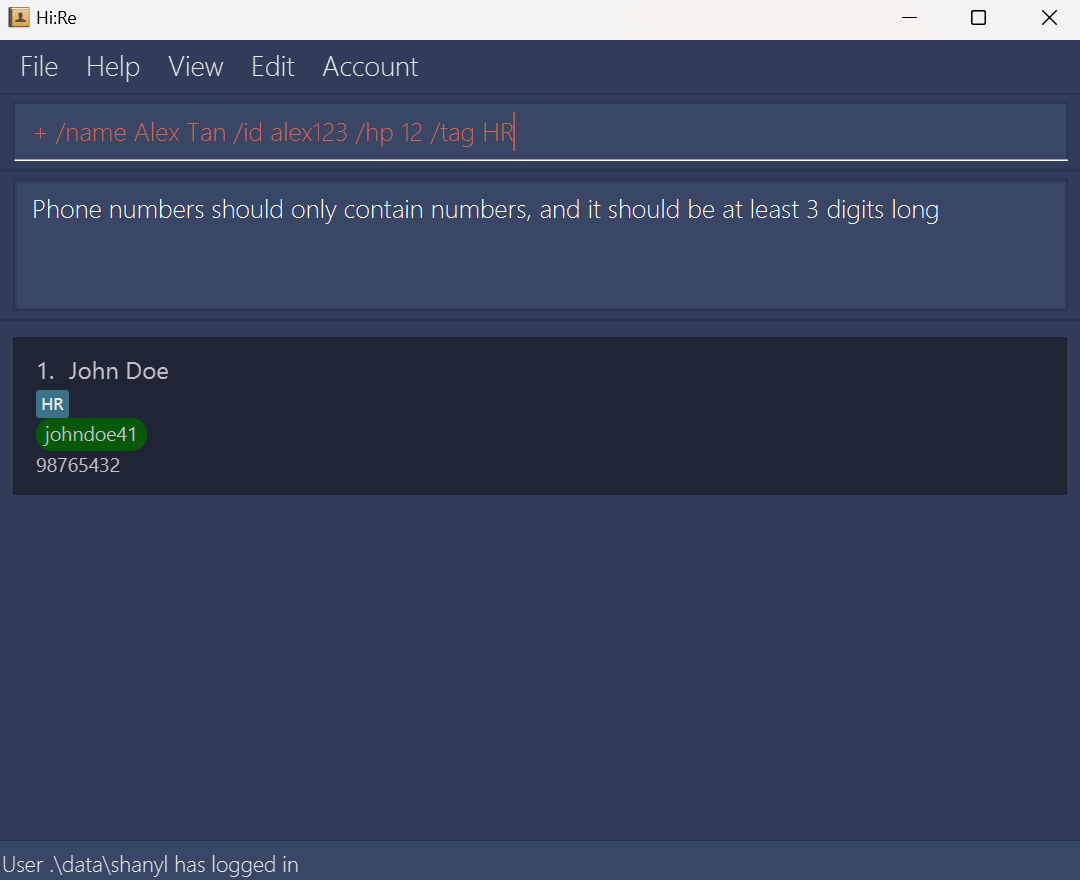
- Invalid ID
- Invalid tag (tag not in tag list)
Deleting a contact: -
You can delete a contact from the addressbook when he/she leaves the company with his/her specified ID.
Format: - /id (id)
Example: - /id johndoe46
- The ID can include alphabets, numbers, and special characters, but cannot be blank and should not contain whitespaces.
- Confirmation of contact deletion
Upon deleting a contact successfully, you will see a similar GUI as illustrated below.
GUI upon successful
-command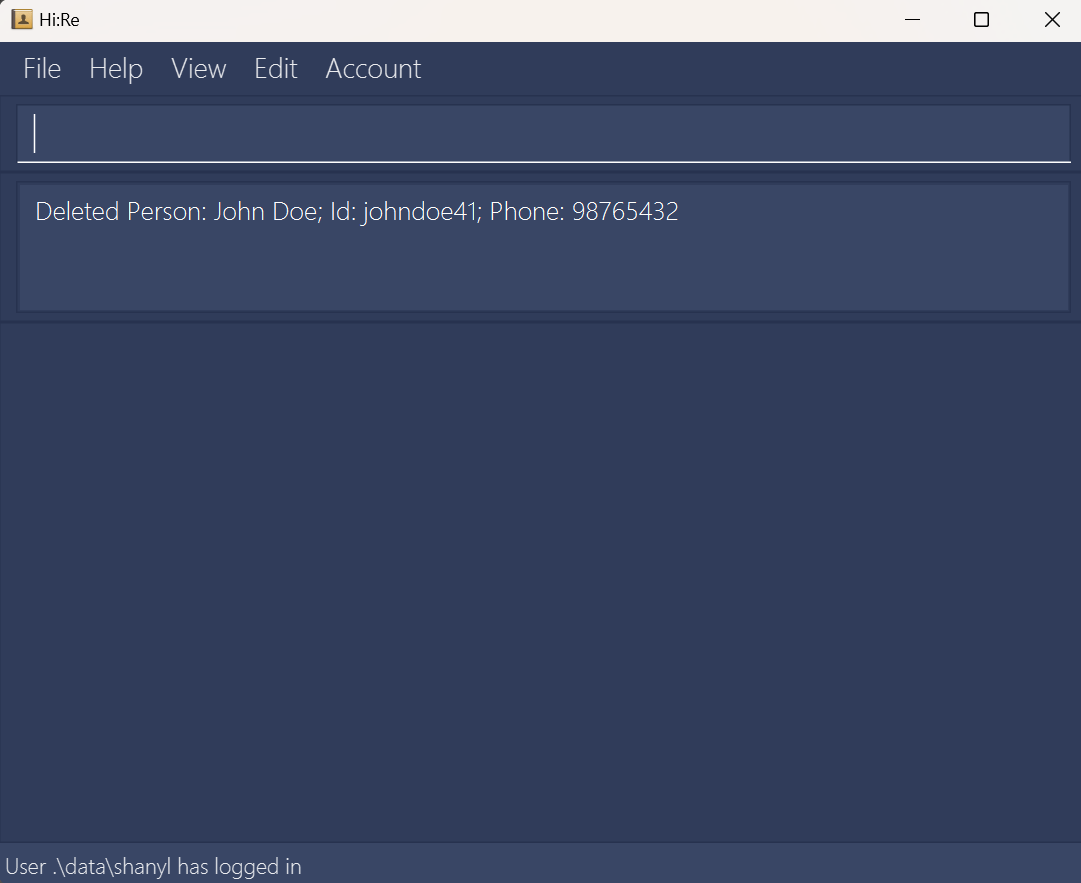
How to handle error when deleting?
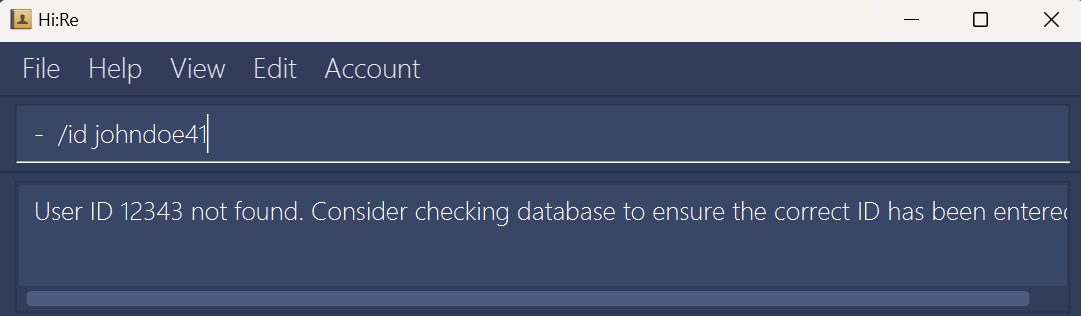
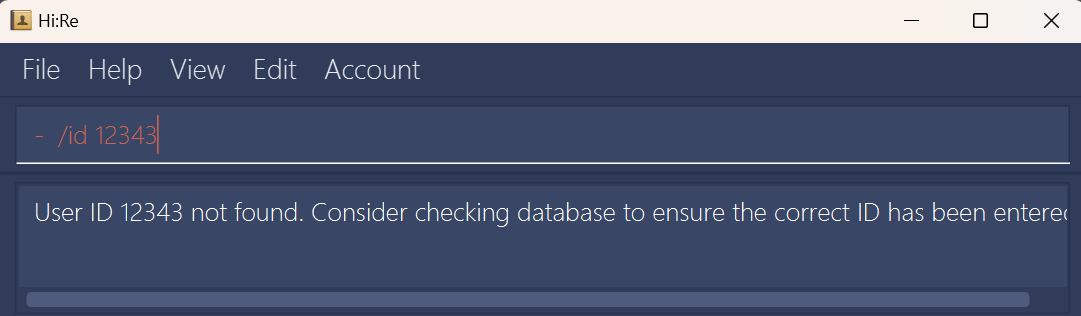
ID not found error: When you enter an ID that is not in the addressbook, the error will be triggered.
ID not found error
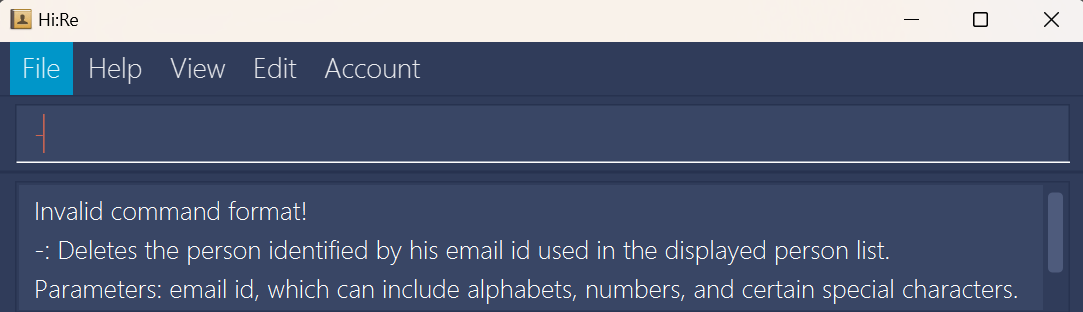
Incomplete field error: You are required to fill in the ID field. Failure to input the ID field with the correct prefix will trigger the error.
Incomplete field error
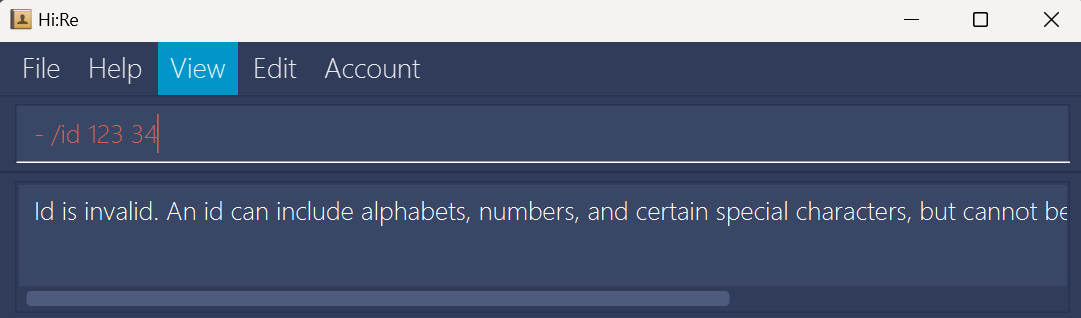
Invalid field error: If you input an ID that violates the requirements, you will trigger the error.
Invalid field error
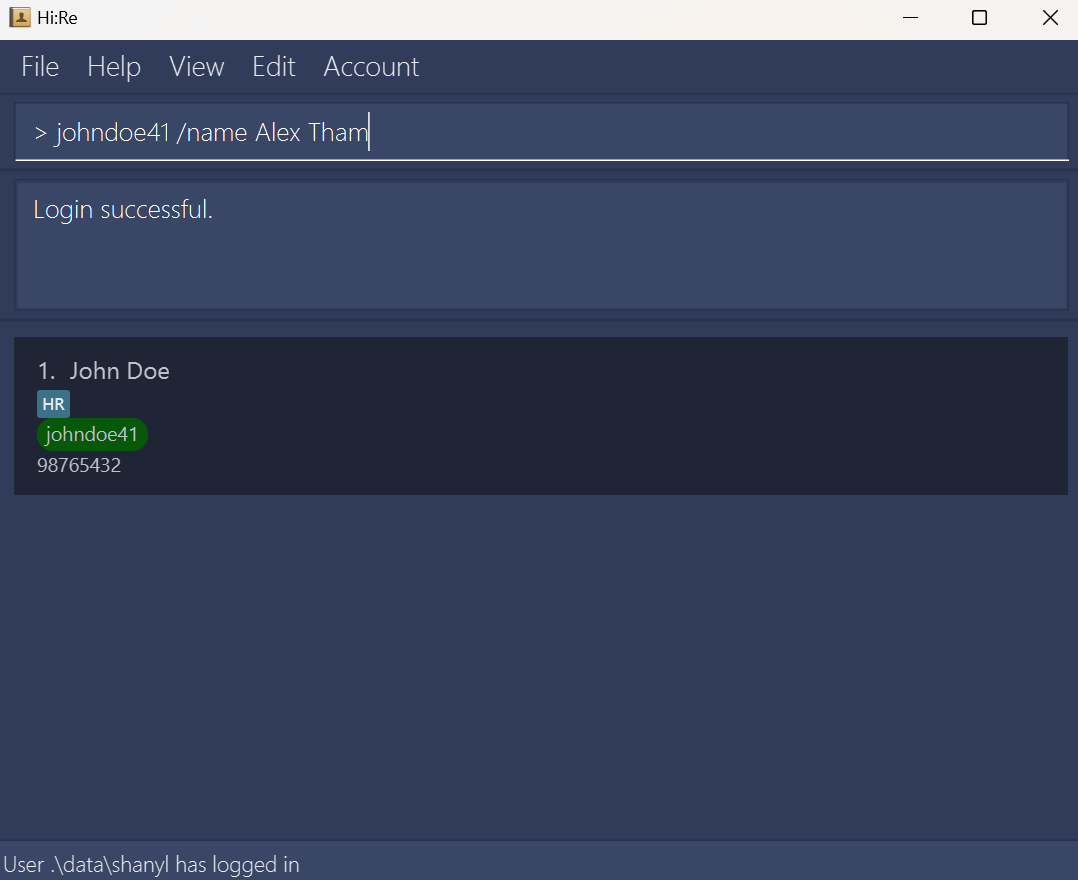
Editing a contact: >
When the employees updates their information, you can edit their details in the addressbook.
Format: > (id) /name (name) /hp (handphone) /tag (tag) {/tag (more tags)...}
Example: > johndoe41 /name John Joe /hp 98765432
The
IDof the contact must be inputted first. The order of the other prefix and field sets are interchangeable, so you are able to input the details in any sequence.
The/idprefix is not used in this command.Fields to be edited are optional, but at least 1 field must be given, excluding
ID.IDis used to identify the contact.If the all fields match the current contact's fields, the edit command will still go through and not give a duplicate person error message. This is due to our unique identifier ID.
Should you wish to edit the
IDof the person, please delete the contact and add the contact with the edittedID.The
nameshould only contain alphanumeric characters and spaces, and should not be blank.
i.e. Names containing non-alphanumeric characters such as Rui-En or Ravi S/O Balakrishnan are not supported for the current version.The
phone numbershould only contain numbers, and it should be at least 3 digits long.Only one
phone numberis allowed for the current version.Excessively long fields will be text-wrapped appropriately.
When editing tags, the existing tags of the contact will be removed (i.e. adding of tags is not cumulative).
(The Initial UI before editing)
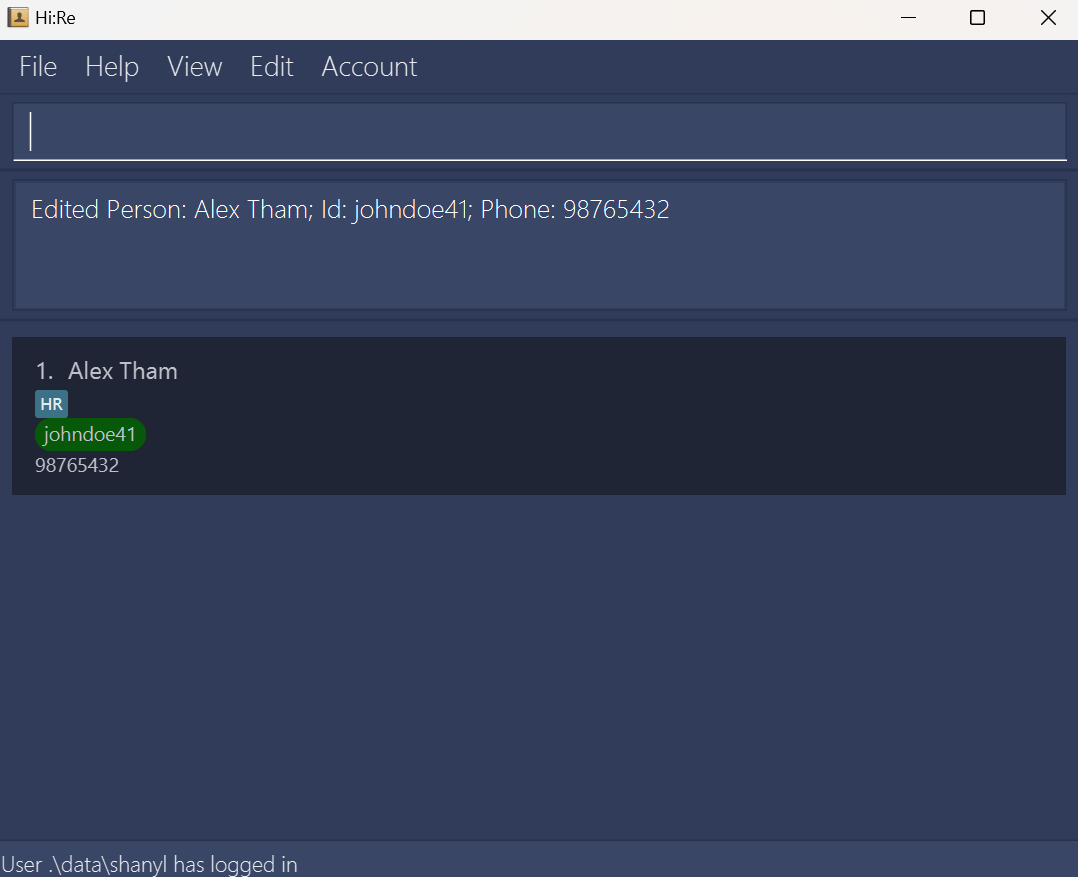
- Confirmation of successful contact edit
Upon editing a contact successfully, you will see a similar GUI as illustrated below.
Error Handling Protocols
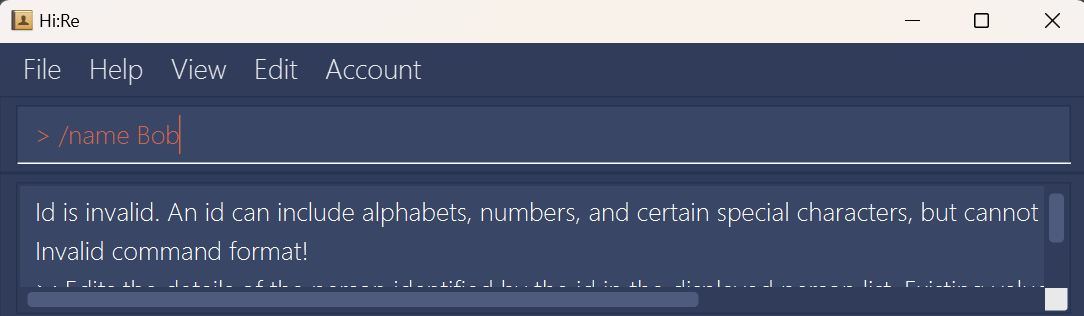
- No ID Error: If you did not provide any ID, the error will be triggered.No ID error
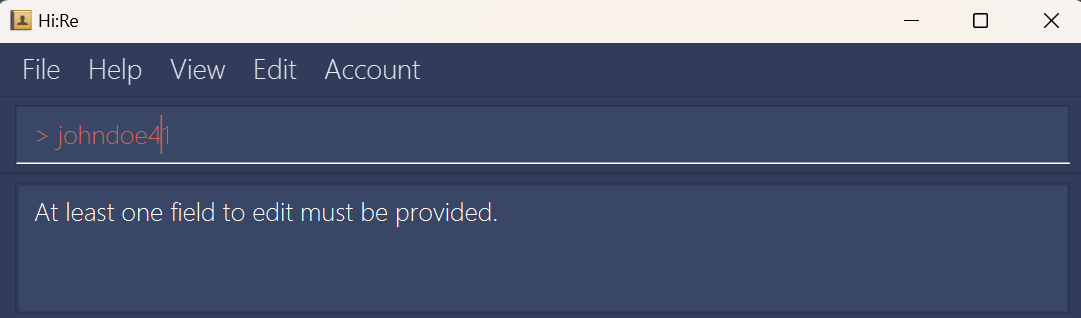
- Incomplete field error: You should provide at least one fail to be edited (excluding
ID). Failure to provide at least 1 field will trigger the error.Incomplete field error
- No ID Error: If you did not provide any ID, the error will be triggered.
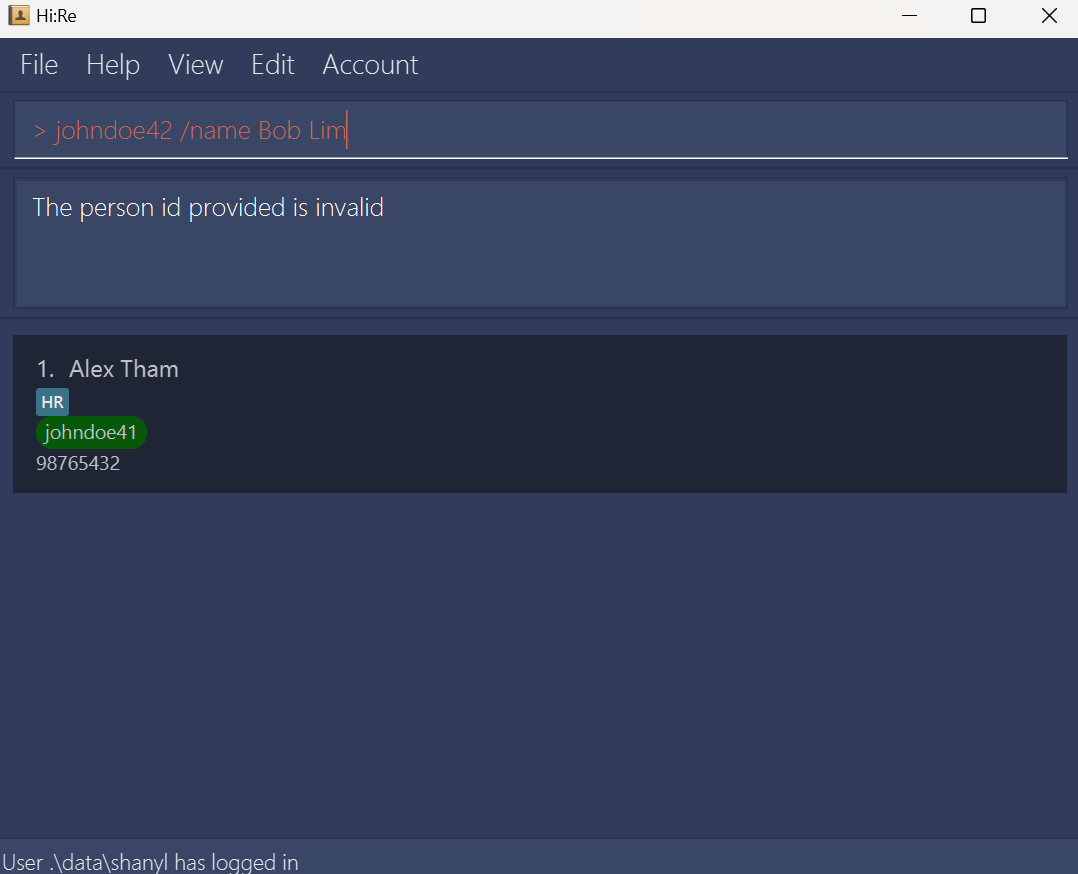
Invalid field error: Any input field violating the requirements will trigger the error. You can follow the requirements above.
Invalid fields error
- Invalid name
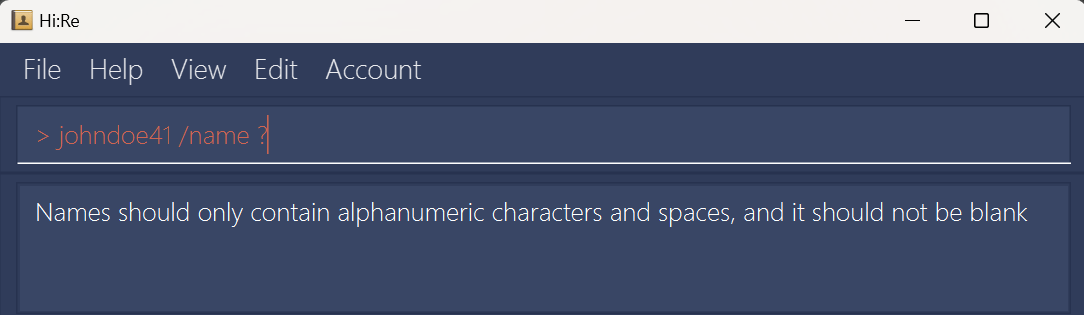
- Invalid phone number
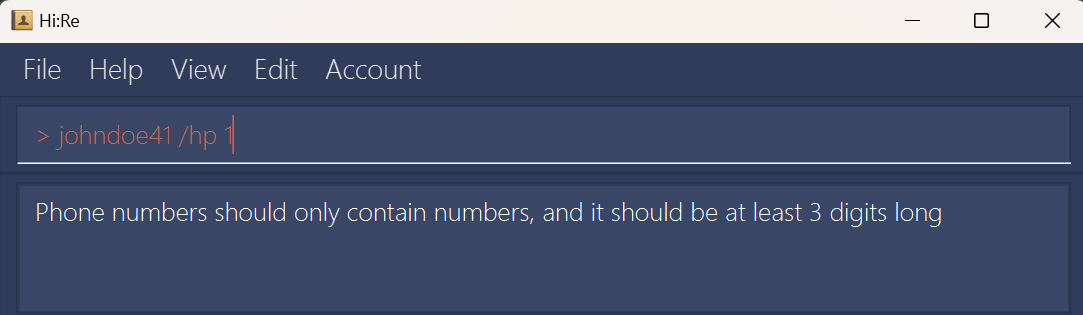
- ID not found
Clearing all contacts: clear
When you want to reset your addressbook, you can clear all contacts from the current addressbook with this command.
Format: clear
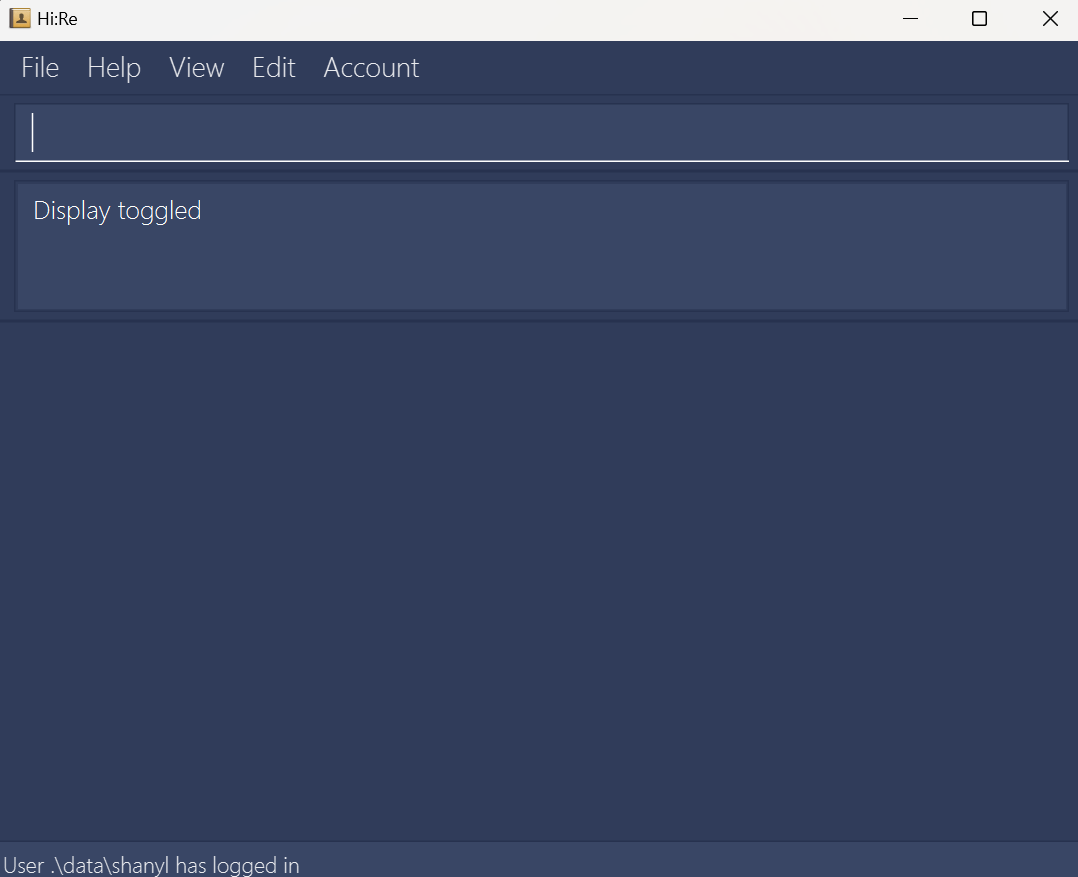
Toggling the display: $
You can toggle the display to view / hide the contacts panel of Hi:Re.
This gives you a cleaner and less-cluttered application workspace and allows you to focus on entering the commands, especially if there are many contacts.
Format: $
💡 Tip
You can also use this command by clicking in the View section of the menu bar.
When your contacts panel is hidden, commands that show a list of contacts (like
lsor?) will consequently not appear to do anything.
Thus, if your result of one of these commands is unexpectedly empty, try toggling the panel and re-entering the command again.

Finding contacts by name: ?
Handling an addressbook with many contacts does not necessasrily mean an increase in difficulty in searching for a specific contact. Using the ? command, you can find all contacts in the addressbook that has names containing the keyword(s) entered.
Format: ? (keyword) {(more keywords)...}
All names consist of alphanumeric characters, hence any non-alphanumeric characters used will result in no contacts found.
All names containing the
(keyword)entered will be matched.
E.g? jowill giveJohnif John exists in the address book.When more than one
(keyword)is entered, all names that match with any of the keywords will be listed.
E.g? jo awill giveJohnandAliif both of them exists in the address book.(keyword)used to match names are CASE-INSENSITIVE.
Example:
? al 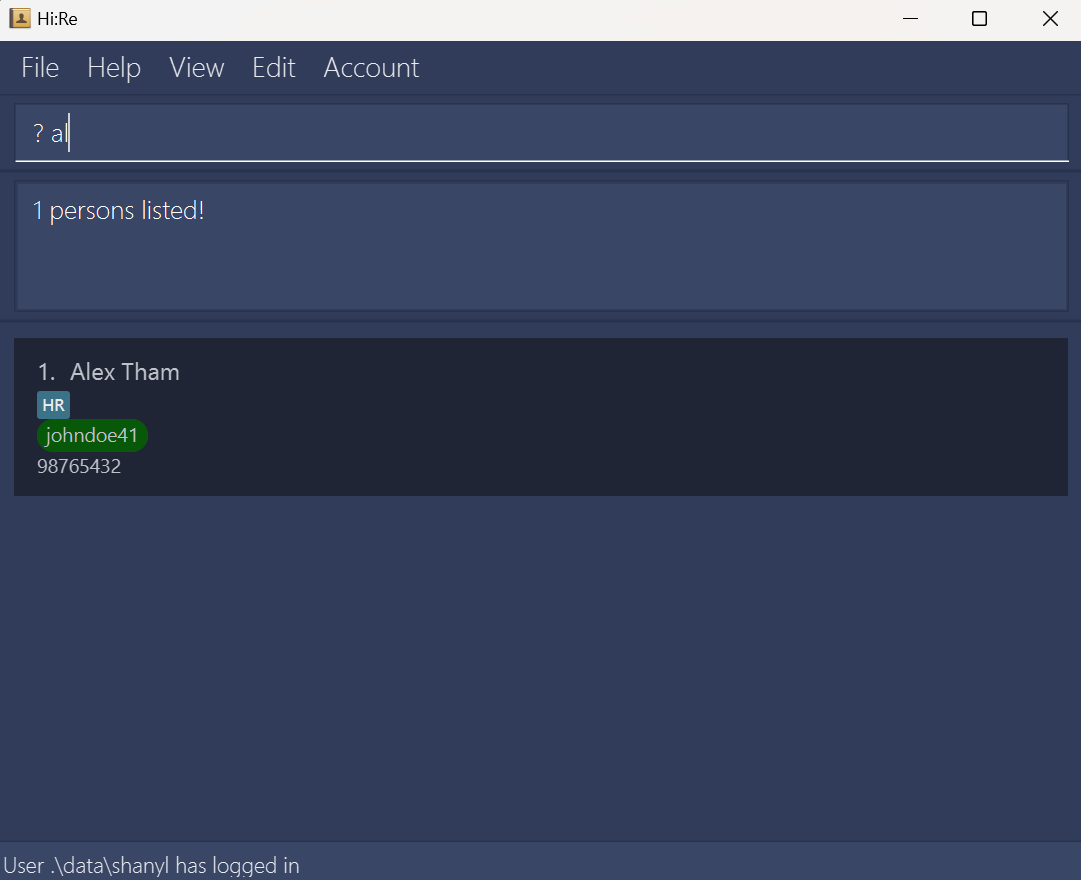
? al ch 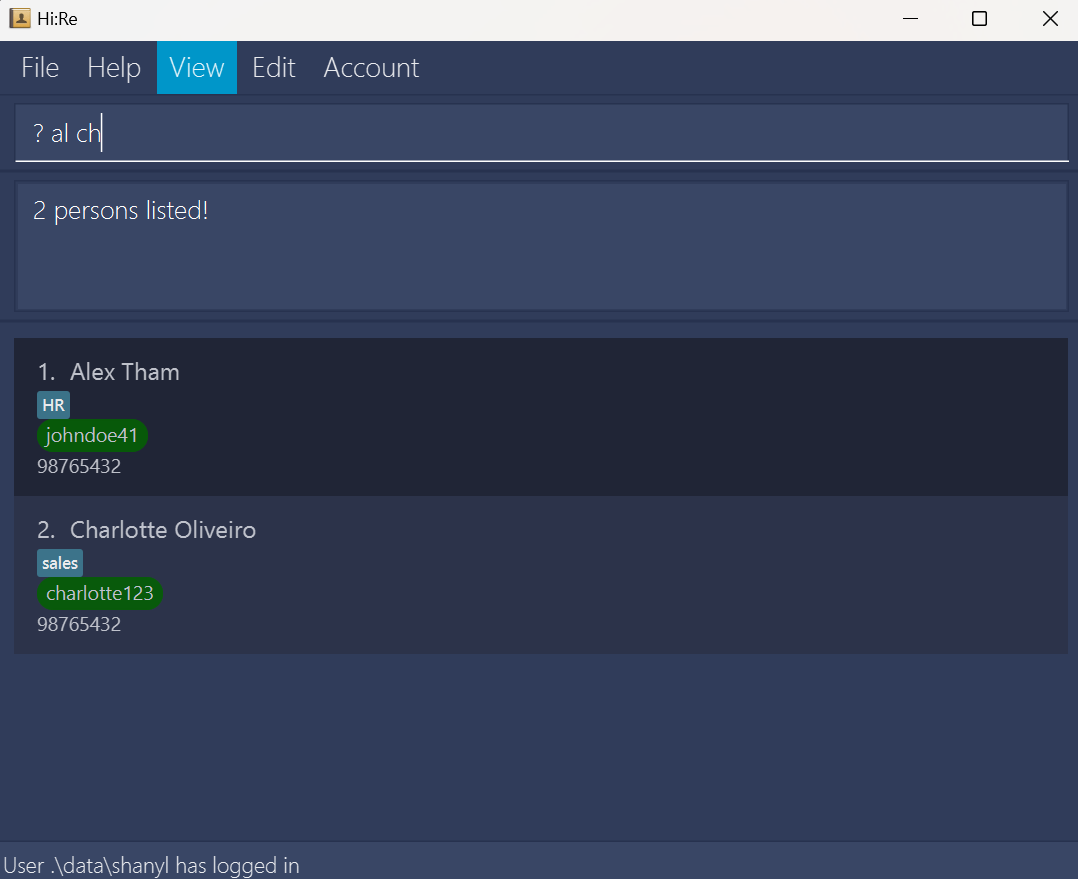
Listing all matching information: ls
Similar to the find, ?, function, you can add filter the contacts by tags!
The ls function serves multiple purposes. You can list all matching information in the addressbook, list all tags or filter the contacts by tags.
Format: ls (args)
(args) = -a: List all contacts in the address book.
(args) = -t: List all tags available.
(args) = (tag_name) {(more tag_name)...} : List all contacts with any (tag_name) specified.
All tags consist of alphanumeric characters, hence any non-alphanumeric characters used will result in no contacts found.
When more than one
(tag_name)is entered, all tags that match any of the words will be listed.
E.gls H finwill list all contacts with tags containingHORfin.(tag_name)used to match tags are CASE-SENSITIVE.
Example:
-a: List all contacts in the address book.Command:
ls -a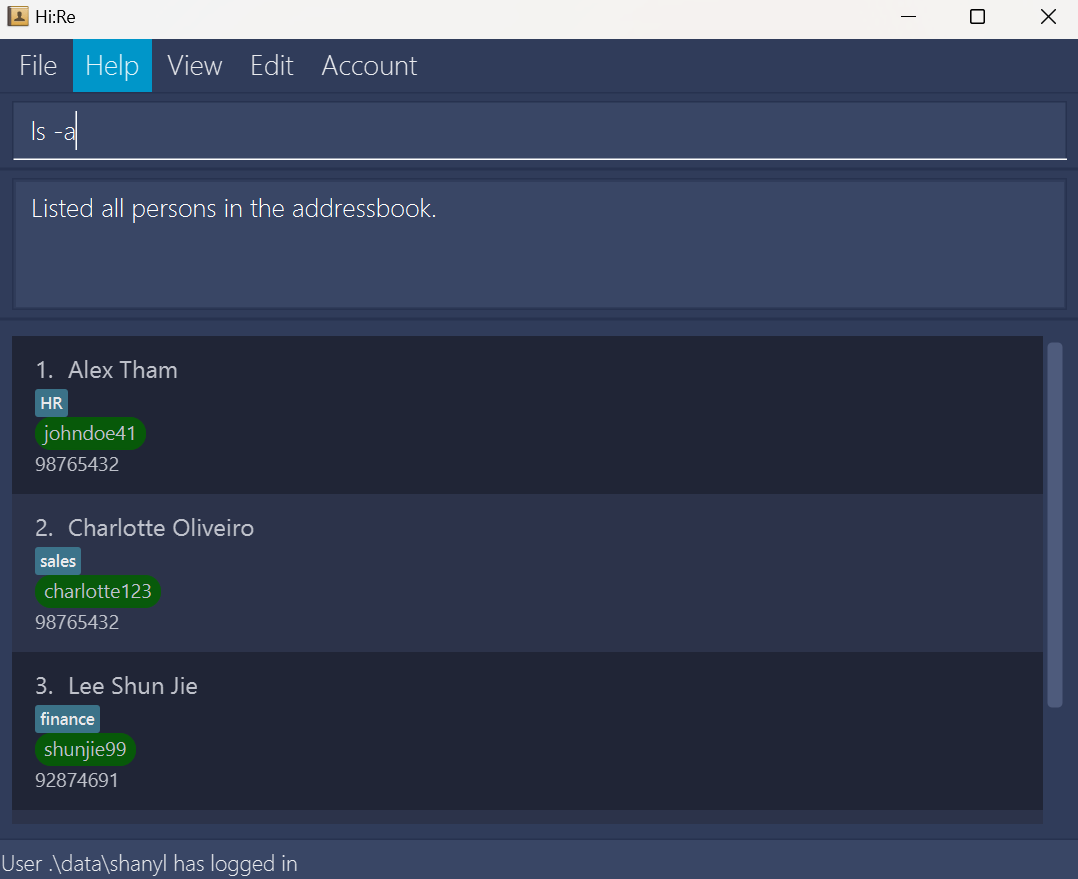
(args) = -t: List all tags available.Command:
ls -t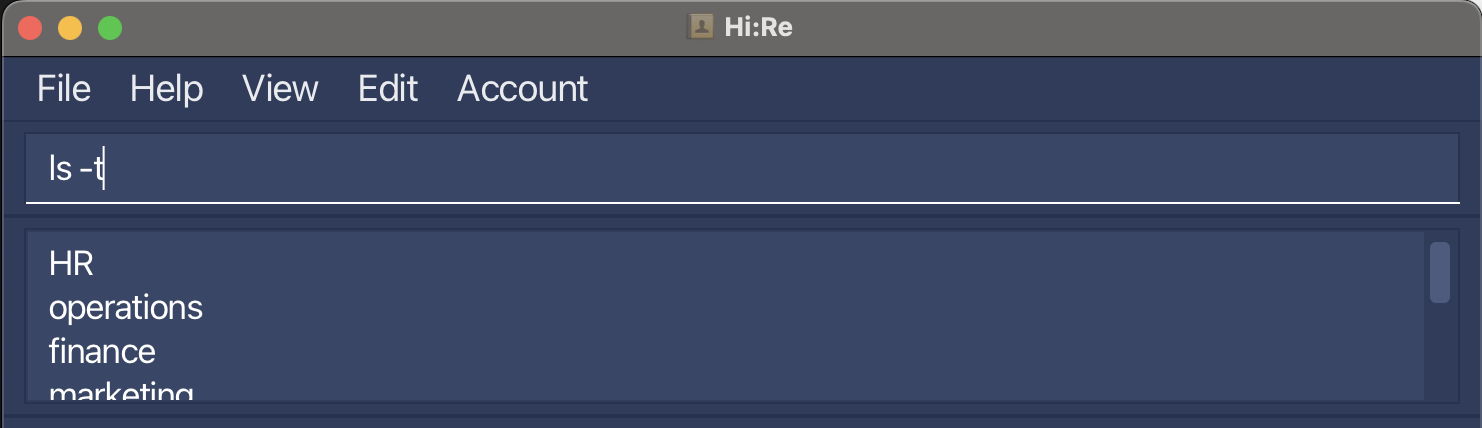
(tag_name): List all contacts with ONE (tag_name).Example:
ls H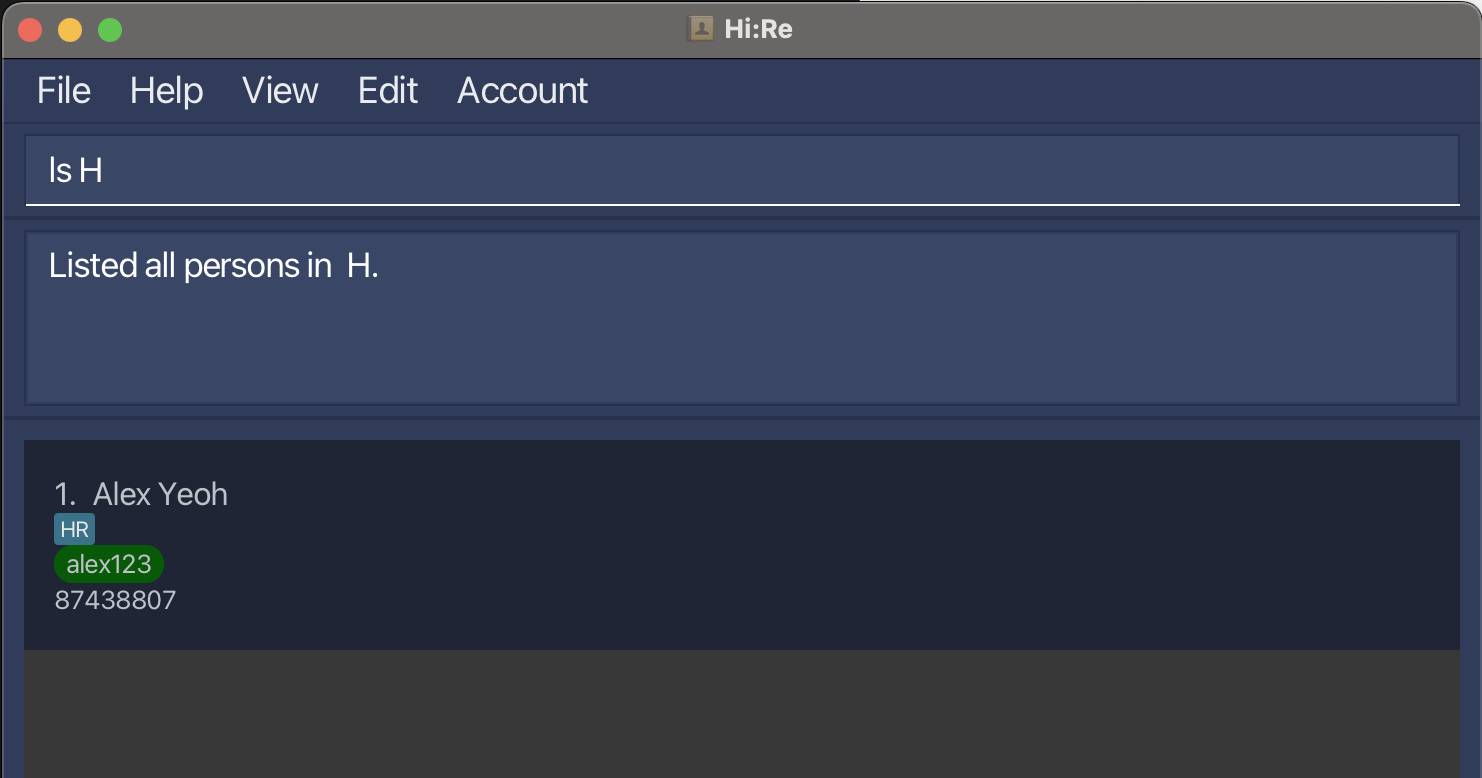
(tag_name): List all contacts with MORE THAN ONE (tag_name).Example:
ls H fin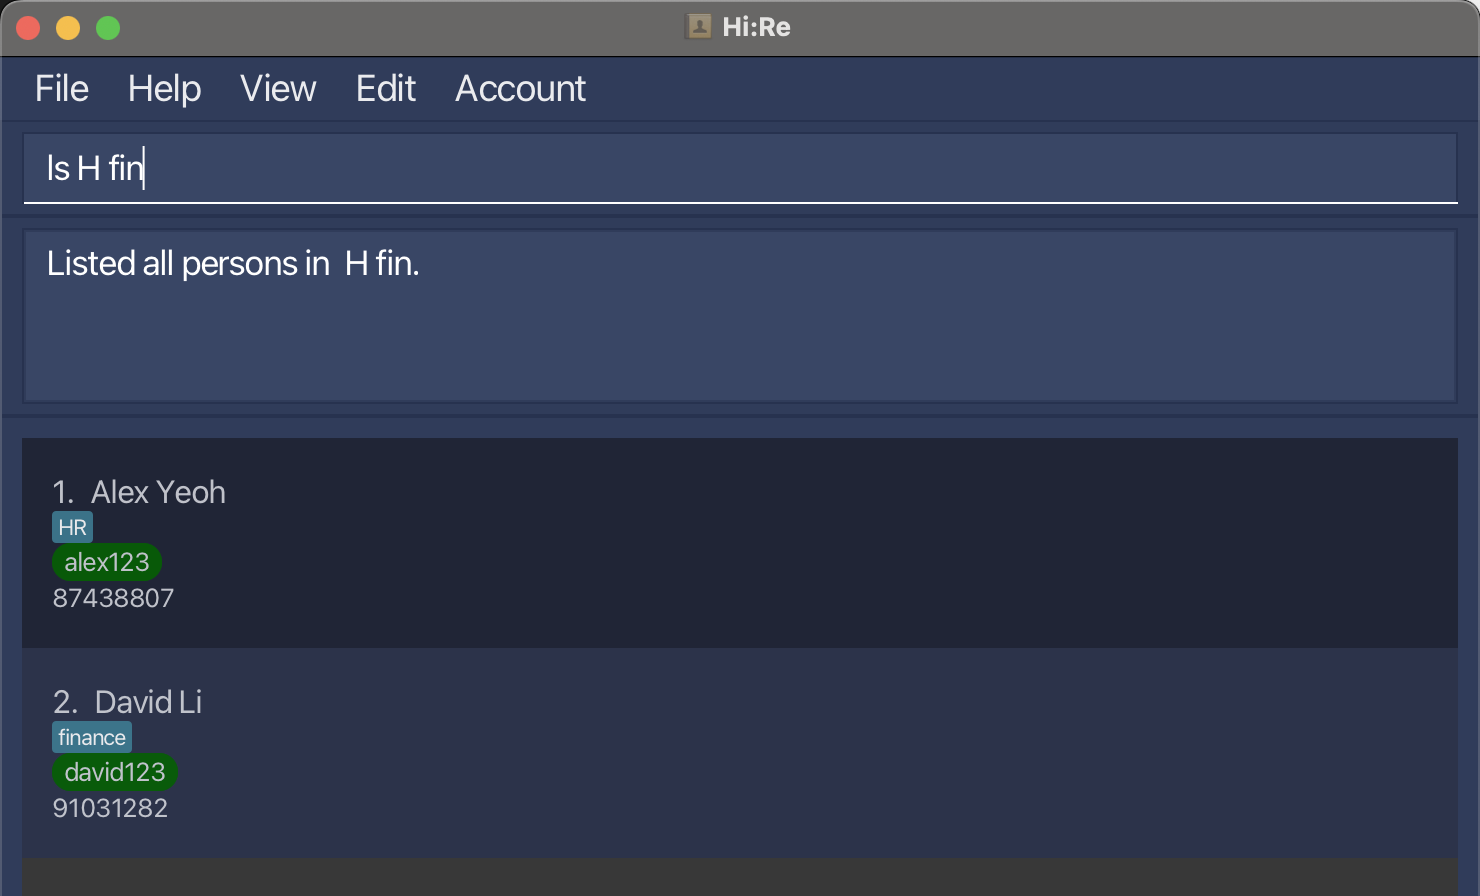
Adding a tag: tag+
You can add tags to categorise contacts to your liking! With the tag+ function, you can customise the contacts of employees with their departments or other relevant information.
Format: tag+ (tag_name)
Default tags:
HR,operations,finance,marketing,IT,sales&RnDTags are MUST be alphanumeric.
Tags are CASE-SENSITIVE.
Example:
CEO: tag+ CEO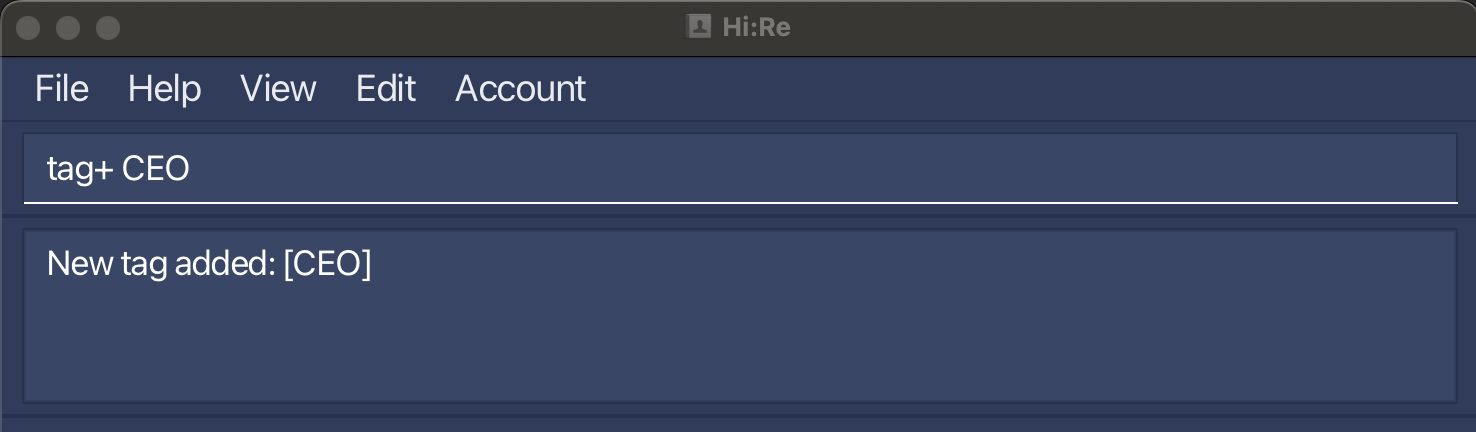
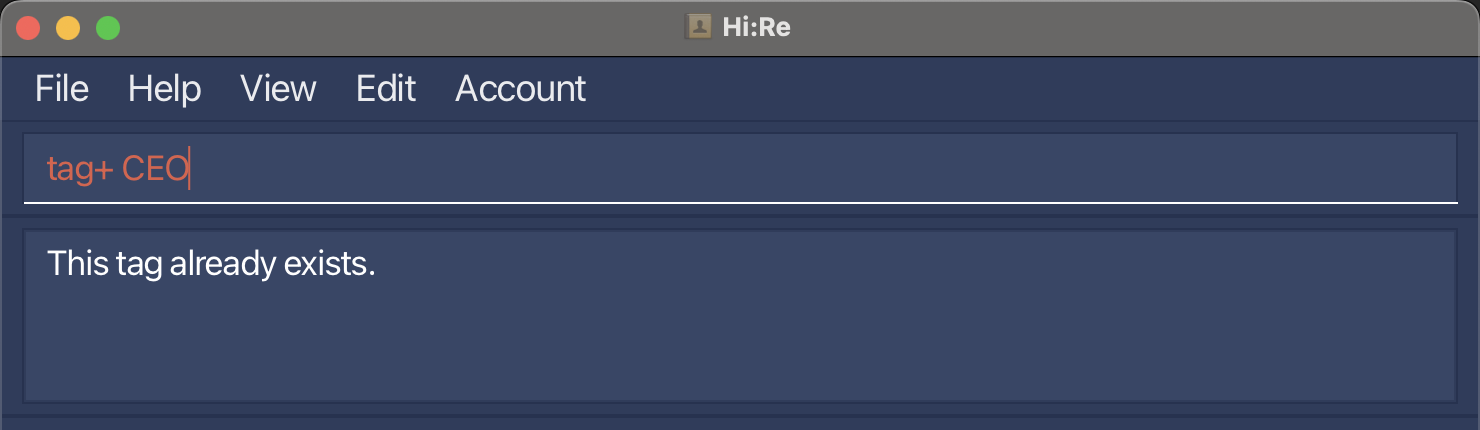
How to handle error when adding tags?
Duplicate tag error: When you add a duplicate tag, the error will be triggered.
Deleting a tag: tag-
You can delete an irrelevant tag from the tag list with tag- command. This prevents the cluttering of tag list with irrelevant / not-in-use tags.
Format: tag- (tag_name)
- A tag cannot be removed if a contact is tagged with the tag-to-be-removed.
Example:
HR: tag- HR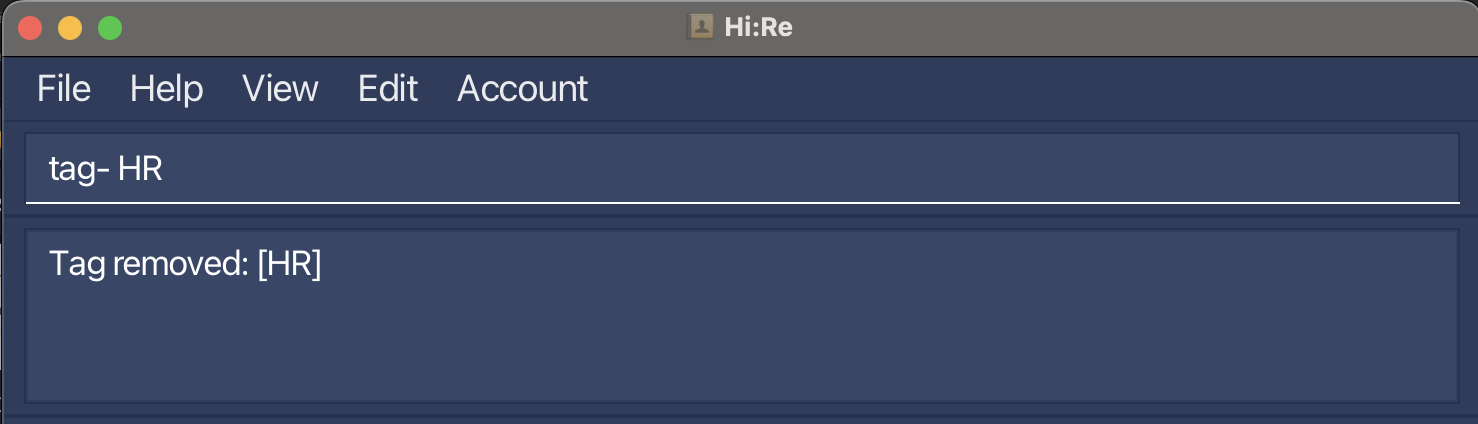
How to handle error when deleting tags?
Tag still in use error: When you try to delete a tag that is still in use, the error will be triggered.

Undoing a command: undo
Did you make a mistake? Fret not, you can undo your previous action / command and restore the address book to the state before the previous undoable command was executed.
Format: undo
Undoable commands: those commands that modify the address book’s content (add, delete, edit and clear).
All other commands (including adding and deleting tags) CANNOT be undone (as of the latest version).
undodoes not revert the deletion of sample data.
💡 Tip
You can also use this command by clicking in the Edit section of the menu bar.
Example:
- Delete the person with the ID
johndoe41using command:- /id johndoe41. Undothe deletion. The person will reappear.
Confirmation of successful undo
Upon undo-ing a command successfully, you will see a similar GUI as illustrated below.
GUI upon successful undo command

How to handle error when undo-ing a command?
- No undoable command error: If there is no more executed command that can be undone, and you attempt to run the undo command, the error will be triggered.No undoable command error

- No undoable command error: If there is no more executed command that can be undone, and you attempt to run the undo command, the error will be triggered.
Redoing a command: redo
You can reverse the most recently undone command. This is helpful when you undo the command unintentionally.
Format: redo
💡 Tip
You can also use this command by clicking in the Edit section of the menu bar.
Example:
- Delete the person with the ID
johndoe41using command:- /id johndoe41. Undothe deletion. The person will reappear.Redothe undone deletion. The person will be deleted again.
Confirmation of successful redo
Upon undo-ing a command successfully, you will see a similar GUI as illustrated below.
GUI upon successful redo command

How to handle an error when redo-ing a command?
- No redoable command error: If there is no more undone command that can be redone, and you attempt to run the redo command, the error will be triggered.No redoable command error

- No redoable command error: If there is no more undone command that can be redone, and you attempt to run the redo command, the error will be triggered.
Exporting data: @
You can export the data in the addressbook to a comma-separated values (.csv) file in the same directory Hi:Re is in. This is especially helpful when you require the data to be used on another platform that supports the widely accepted data file (.csv files).
Format: @ /filename (filename)
Example: @ /file contacts
Note that you need not add the
.csvfile extension to the filename argument when executing this command.
i.e. Hi:Re will do this for you! Hence, the command@ /filename contactswill export the data tocontacts.csv.The filename should follow standard filename conventions on your system. (e.g. no special characters)
If a
.csvfile already exists with the given filename, the command will not execute and an error will be thrown.
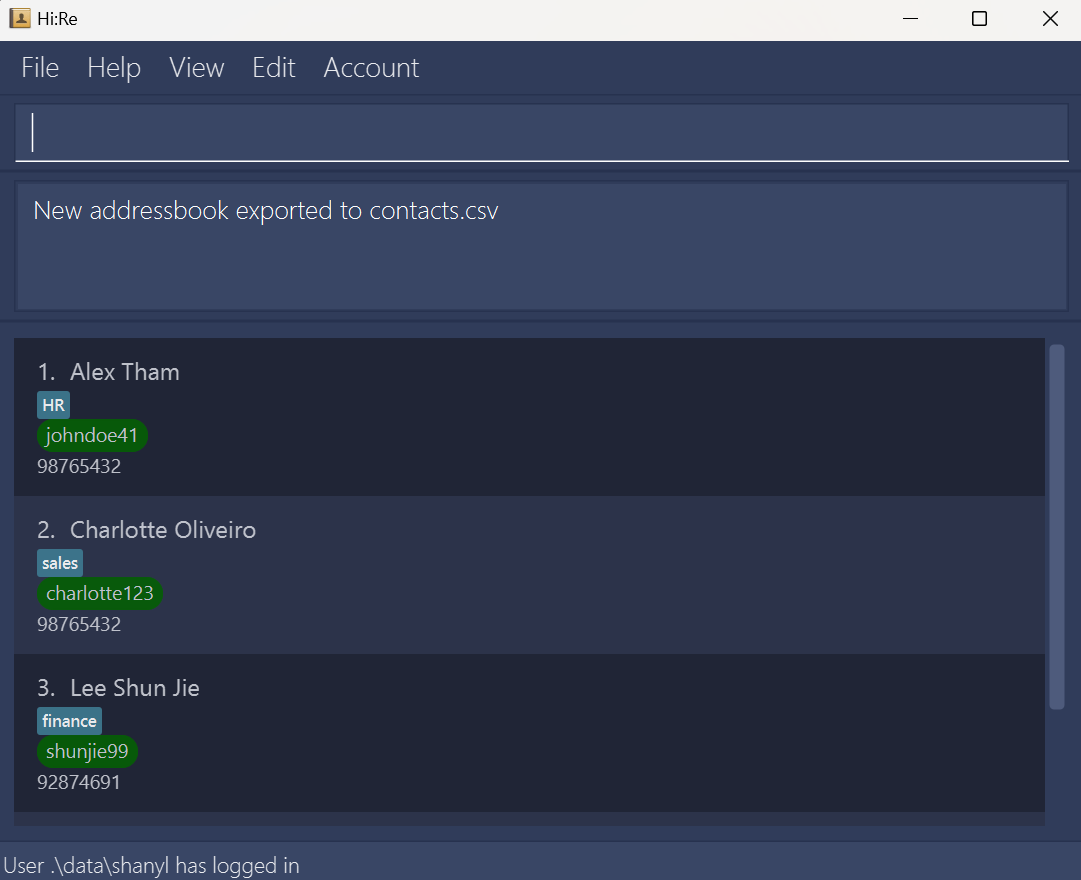
Confirmation of Successful Export
Upon a successful export, you will see a similar GUI as illustrated below..
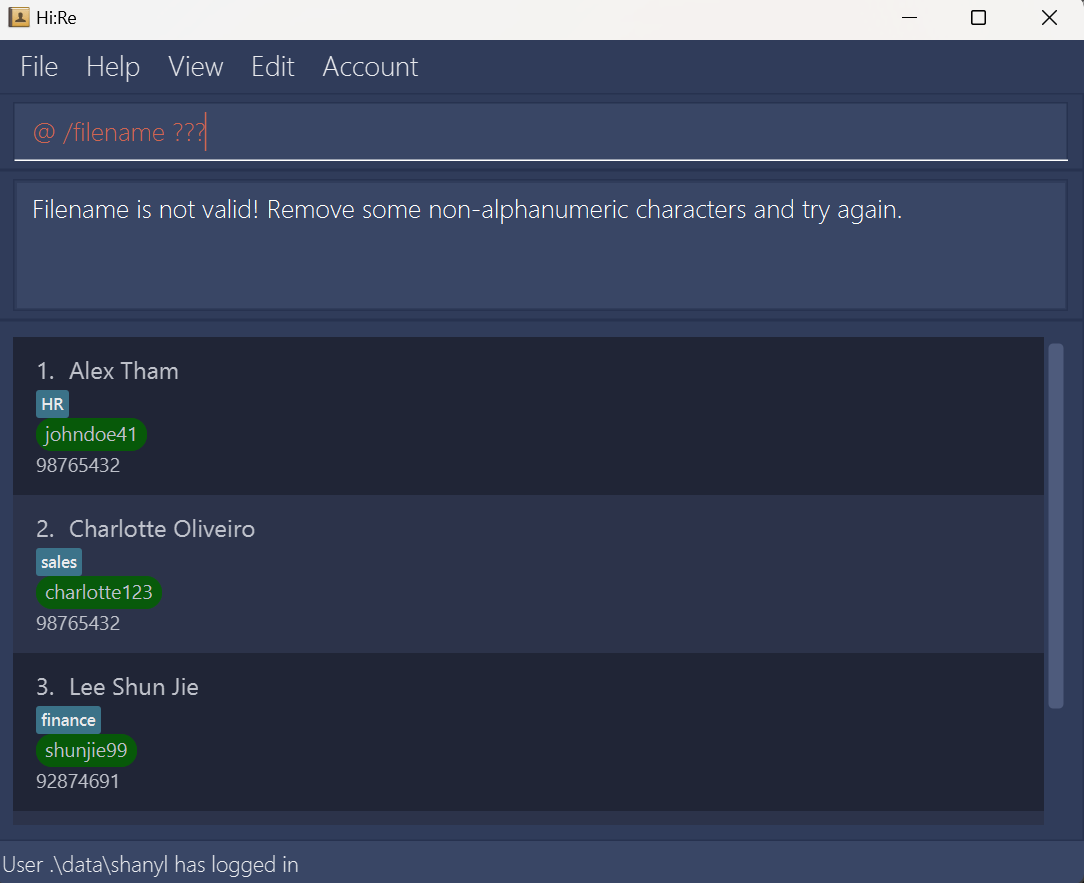
How to handle errors when exporting data?
Invalid filename error: If you have provided an invalid filename for your current system, the error will be triggered. You can search up and follow the specific filename requirements for your system.
Invalid filename error
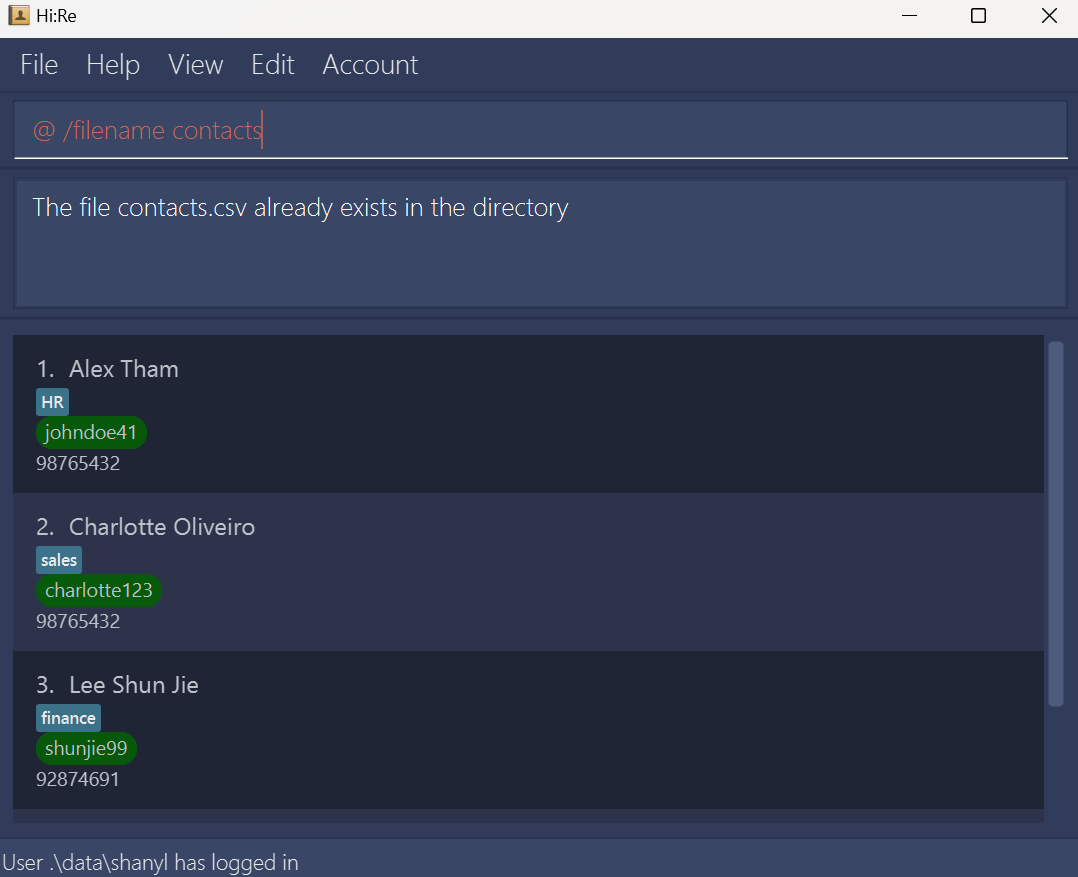
Filename already taken error: If you have provided a name that is a duplicate of a
.csvfile exisitng in the same directory as the program, the error will be triggered.Filename already taken error
Link to our User Guide: help
If you need to refer back to this guide, you can simply use the help command. It will lead you to our user guide (i.e. this page) when using Hi:Re!
Format: help

Exit the application: exit
After using Hi:Re, you can close the application by using the exit command. It will log the user out of their account, and close the Hi:Re application window.
Format: exit
Built-In Features
These are features built-in for your ease of use! No commands are required for it to work.
- Sort
- Deletion of sample data upon first addition
Sort
The addressbook is sorted in alphabetical order by name every time you add / edit / delete a new contact.
Deletion of sample data upon first addition
By adding your first contact into Hi:Re, the sample data will be deleted! This function will be in place for every new account.
It is important that you do NOT perform any operations other than adding contacts upon your first log in, as there is no guarantee that this feature will work properly afterwards.
Note: undo does not revert this action.
Information security
Hi:Re seeks to protect the private and personal information in your addressbook.
- Password Hashing
We use the SHA-256 hashing algorithm to hash the passwords.
Passwords are hashed before being stored. Hence, even if your data file is compromised, your passwords are not easily retrievable.
Design Philosophy
Our software development team has meticulously crafted this application to provide you with a seamless and intuitive user experience. At the heart of our design methodology lies a commitment to simplicity, efficiency, and user-centricity.
Dark Blue UI for Enhanced Comfort
Our application features a sophisticated dark blue user interface, carefully chosen to promote relaxation and reduce eye strain during extended usage sessions. We understand the importance of creating an environment that is both visually appealing and gentle on the eyes. By embracing dark blue as our primary color scheme, we aim to enhance your overall experience and encourage prolonged engagement with the application.
Toggle Display Option for Streamlined Navigation
Navigating through large amounts of contact data can be overwhelming. That's why we've implemented a convenient toggle display option, allowing you to effortlessly hide or reveal extensive contact data sets with a simple click. This feature empowers you to customize your viewing experience, providing flexibility and control over the information displayed on your screen. Whether you're focusing on specific details or seeking a clutter-free interface, our toggle display option ensures seamless navigation and enhanced productivity.
Command-based Data Entry System
We believe in minimizing unnecessary mouse usage and maximizing efficiency in data entry tasks. Our application boasts a streamlined command-based data entry system, designed to simplify the input process and minimize user effort. By leveraging intuitive keyboard commands, you can swiftly navigate through fields, input data, and execute commands with precision and speed. This approach not only accelerates contact manipulation tasks but also reduces cognitive load, allowing you to focus on your workflow without distractions.
In summary, our application's design methodology is guided by a dedication to user comfort, efficiency, and accessibility. From the calming dark blue UI to the streamlined command-based data entry system, every aspect of our design reflects our unwavering commitment to enhancing your productivity and satisfaction.
FAQ
Q: How do I transfer my data to another Computer?"
A: You can install Hi:Re in the other computer and overwrite the empty data file it creates with the file that contains the data of your previous Hi:Re home folder.
Q: What is Java 11 and where can I download it?"
A: Java 11 is the version of the Java Programming Language that our application uses to function. Any version of Java, 11 and above will work. You can download it from the official Java website.
Known issues
When using multiple screens, if you move the application to a secondary screen, and later switch to using only the primary screen, the GUI will open off-screen. The remedy is to delete the
preferences.jsonfile created by the application before running the application again.Sample data sometimes does not clear if it is edited before a new contact is added. As such, we recommend that you add a new contact immediately upon first logging into Hi:Re before executing any other commands.
When your contacts panel is hidden, commands that show a list of contacts (like
lsor?) will consequently not appear to do anything Thus, if your result of one of these commands is unexpectedly empty, try toggling the panel and re-entering the command again.Currently you cannot directly recover passwords of your accounts. If you forget the account password for a certain addressbook, please open
accounts.txtand delete the whole line with the username of that addressbook. Then, you can launch the application andregisteran account with the same username to access the original addressbook. Apart from this, please do not arbitrarily edit the .txt file, as this may cause account information to be read incorrectly or even cause the application to fail to start.
Command summary
| Action | Command Format |
|---|---|
| Register an account | register /u (username) /p (password) |
| Login into an account | login /u (username) /p (password) |
| Logout from an account | logout |
| Add a contact | + /name (name) /id (id) /hp (handphone) /tag (tag) {/tag (more tags)...} |
| Delete a contact | - /id (id) |
| Edit a contact | > (id) /name (name) /hp (handphone) /tag (tag) {/tag (more tags)...} |
| Clear all contacts | clear |
| Toggle display | $ |
| Find contacts by name | ? (keyword) {(more keywords)...} |
| List all matching information | ls (args) |
| Add a tag | tag+ (tag_name) |
| Delete a tag | tag- (tag_name) |
| Undo previous command | undo |
| Redo a command | redo |
| Export data | @ |
| Link to user guide | help |
| Exit the application | exit |
Future Integrations
In the future, we plan to integrate some of the following features:
A more rigorous account management system, which will allow you to manage users as an administrator, and assign different levels of authentication or security to the different personal data collected.
A remote database management system, which links all Hi:Re instances on different machines to the same Hi:Re database. This will allow you to collaborate with other Hi:Re users! There are more benefits to having a database system in place.
More open-ended tagging and field options, allowing for Hi:Re to be fully customisable by you as per your organisation's requirements.
Multiple phone numbers, you to add in both the employees' office and personal phone numbers to the same contact.
Improving input acceptance, will allow you to be more flexible with the case-sensitivity and characters when it comes to
names andtags.
Support and Feedback
We are a dedicated team of developers committed to evolving Hi:Re to always be better, and to serve you better!
If you have any enquiries or feedback, do reach out to us at our website!